
No-bake desserts have become increasingly popular due to their simplicity and versatility. One standout recipe is the Raspberry No-Bake Split Cake. With its perfect combination of fresh raspberries, bananas, a creamy filling, and a crunchy crust, this dessert is a surefire crowd-pleaser. Whether you’re hosting a summer gathering or simply craving a sweet treat, this recipe delivers a perfect balance of textures and flavors without ever turning on the oven.
If you’re looking to elevate your dessert repertoire, this cake is an excellent choice. For a refreshing twist, you can explore similar creations like no-bake lemon raspberry icebox cakes, which highlight the tart flavors of citrus paired with raspberries.
What Is a Raspberry No-Bake Split Cake?
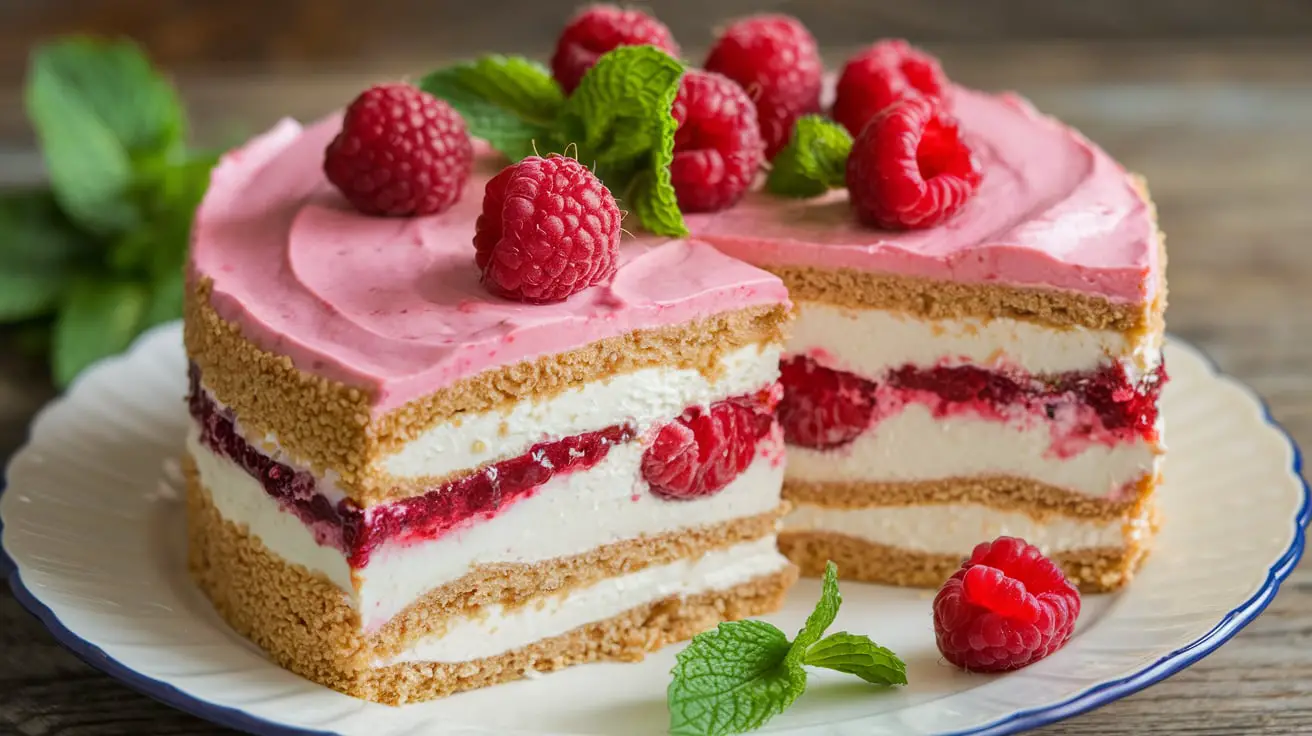
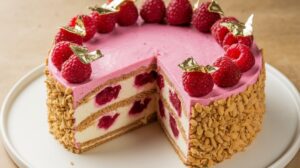
At its core, the Raspberry No-Bake Split Cake is a chilled, layered dessert featuring a graham cracker crust, a rich cream filling, and vibrant fruit toppings. This recipe pays homage to the classic banana split by incorporating bananas and raspberries, offering a refreshing take on a nostalgic favorite.
This cake’s charm lies in its adaptability—you can easily customize it with alternative fruits, gluten-free crusts, or reduced-sugar options. Curious about how no-bake desserts work? Learn more about the basics by exploring easy no-bake recipes that highlight similar techniques.
Ingredients You’ll Need
Crafting the perfect Raspberry No-Bake Split Cake begins with the right ingredients. Here’s what you’ll need:
Crust
- Graham cracker crumbs (or a gluten-free alternative)
- Melted butter
- Granulated sugar (optional)
Cream Filling
- Cream cheese (softened)
- Powdered sugar
- Heavy whipping cream (or pre-made whipped topping)
- Vanilla extract (optional)
Fruit Layers
- Fresh raspberries (frozen works, too, when thawed and dried)
- Sliced bananas
- Optional: strawberries, blueberries, or blackberries for variety
Toppings
- Chocolate syrup or melted chocolate
- Crushed nuts (e.g., pecans or almonds)
- Whipped cream
- Fresh mint leaves for garnish
Step-by-Step Guide to Making a Raspberry No-Bake Split Cake

Follow these detailed instructions to assemble a flawless dessert:
1. Prepare the Crust
- Combine graham cracker crumbs, melted butter, and optional sugar in a bowl. Mix until the texture resembles wet sand.
- Press the mixture evenly into the bottom of a springform pan. Use the back of a spoon or a flat-bottomed glass for a smooth surface.
- Chill the crust in the refrigerator for at least 15 minutes.
2. Create the Cream Filling
- In a mixing bowl, beat cream cheese and powdered sugar until smooth.
- Gradually add heavy whipping cream, beating until the mixture is light and fluffy. Add vanilla extract if desired.
- Spread half of the cream mixture over the chilled crust.
3. Layer the Fruits
- Arrange a layer of sliced bananas on top of the cream filling.
- Add a layer of fresh raspberries. For a burst of flavor, include strawberries or blueberries.
4. Repeat and Assemble
- Spread the remaining cream filling over the fruit layers.
- Repeat the banana and raspberry layers if desired for a taller cake.
- Top with chocolate drizzle, crushed nuts, and whipped cream.
5. Chill and Serve
- Refrigerate the assembled cake for at least 4–6 hours, or overnight for best results.
- Carefully remove the springform pan before serving.
Variations and Customizations
The Raspberry No-Bake Split Cake is incredibly versatile. Here are some ways to customize it:
Fruit Swaps
- Substitute raspberries with blackberries, cherries, or peaches.
- Use a combination of tropical fruits like mango and pineapple for a summery twist.
Crust Alternatives
- Replace graham crackers with Oreo crumbs for a chocolatey base.
- Opt for a nut-based crust for a gluten-free option.
Flavor Enhancements
- Add a splash of liqueur (e.g., Grand Marnier) to the cream filling.
- Incorporate lemon or lime zest for a zesty kick.
Healthier Options
- Use low-fat cream cheese and whipped topping for a lighter version.
- Replace sugar with natural sweeteners like honey or maple syrup.
Serving and Presentation Tips
The Raspberry No-Bake Split Cake is as much a feast for the eyes as it is for the taste buds. A little extra attention to presentation can take this dessert from delicious to showstopping. Here are some tips to serve and present your cake beautifully:
1. Slice and Serve Cleanly
- Chill Thoroughly: Ensure the cake is well-chilled before slicing. A firmer cake holds its shape better.
- Use a Warm Knife: Dip a knife in warm water, dry it, and make clean cuts for neat slices. Repeat between cuts for the best results.
- Remove from the Pan Carefully: If using a springform pan, release the sides slowly to avoid cracking the edges.
2. Garnish with Flair
Enhance the visual appeal with simple garnishes:
- Fresh Raspberries: Arrange a cluster of raspberries on top for a pop of vibrant color.
- Mint Leaves: Add a few fresh mint leaves for a touch of elegance.
- Drizzles: Use a squeeze bottle or spoon to drizzle chocolate syrup or raspberry coulis in an artistic pattern.
3. Individual Portions
Serving the cake in pre-portioned sizes can make it easier to handle and more aesthetically pleasing:
- Mason Jars or Cups: Layer the ingredients into small jars or cups for a portable, party-ready option.
- Mini Cakes: Use ramekins or silicone molds to create mini versions of the dessert.
4. Plate Like a Pro
Presentation matters, even on the plate:
- Add a Sauce Base: Drizzle raspberry sauce, chocolate syrup, or caramel on the plate before placing the slice for a restaurant-style finish.
- Contrast Colors: Pair the dessert with colorful fruits like kiwi or mango slices to create a stunning visual contrast.
- Use Edible Flowers: Add edible blooms for an extra-special touch at weddings or parties.
5. Customize for Occasions
Tailor the cake’s appearance to suit specific events:
- Themed Decorations: Add sprinkles, candy, or colored frosting to match holiday or party themes.
- Seasonal Garnishes: Use seasonal fruits like strawberries in summer or cranberries in winter for a festive twist.
- Layer Creativity: Create patterns with the fruit layers for a fun, decorative effect.
6. Serving Temperature
- Serve the cake chilled for the best texture and flavor.
- If stored in the freezer, allow it to thaw for 15–20 minutes before serving to avoid overly firm layers.
7. Pair It Perfectly
Complement the dessert with these pairing ideas:
- Beverages: Serve with coffee, tea, or a chilled dessert wine for an indulgent experience.
- Light Desserts: Pair it with simple cookies or a fruit salad for a balanced dessert spread.
Troubleshooting Common Issues
Making a Raspberry No-Bake Split Cake is straightforward, but a few common challenges can arise. Here’s how to troubleshoot them to ensure your dessert turns out perfectly every time:
1. Soggy Crust
A soggy crust can ruin the texture of your cake. Prevent this with these tips:
- Chill the Crust: Ensure the crust is properly chilled before adding the cream layer. This helps it firm up and prevents it from absorbing moisture.
- Use the Right Ratio: Avoid using too much butter, as this can make the crust dense and greasy. Stick to the recipe proportions for the best results.
- Line the Pan: Use parchment paper to line your pan. This makes it easier to remove the cake and helps the crust retain its structure.
2. Runny Cream Filling
The filling is the heart of the cake, and a runny texture can compromise its integrity. Here’s how to fix it:
- Whip the Cream Properly: Ensure the heavy cream is whipped to stiff peaks before folding it into the cream cheese mixture.
- Use Full-Fat Ingredients: Reduced-fat cream cheese or whipped topping may result in a less stable filling. Full-fat versions provide a firmer texture.
- Chill Thoroughly: Allow the cake to chill for at least 4–6 hours, or overnight, to help the filling set completely.
3. Browning Bananas
Bananas can brown quickly, affecting the cake’s visual appeal. Avoid this by:
- Coating with Lemon Juice: Toss banana slices in a small amount of lemon or lime juice to prevent oxidation.
- Assemble Just Before Serving: If possible, add the banana layer close to serving time for the freshest appearance.
4. Uneven Layers
Uneven layers can make the cake look messy and affect its structure. To avoid this:
- Spread Evenly: Use an offset spatula or the back of a spoon to level each layer as you go.
- Work in Thin Layers: Add multiple thin layers of fruit and filling rather than one thick layer, ensuring stability and an even appearance.
5. Excess Moisture from Fruits
Excess moisture from raspberries or other fruits can make the layers soggy. Here’s how to manage it:
- Dry the Fruits Thoroughly: Pat raspberries and other fruits dry with a paper towel before adding them to the cake.
- Layer Strategically: Place a thin layer of cream filling beneath the fruits to act as a barrier.
6. Cracks When Removing the Cake
Cracks can form if the cake is difficult to remove from the pan. Avoid this by:
- Use a Springform Pan: This makes it easy to release the cake without disturbing its layers.
- Grease the Edges: Lightly grease the sides of the pan or use a strip of parchment paper for easy release.
7. Toppings Sliding Off
Sliding toppings can detract from the presentation. To prevent this:
- Chill Between Layers: Allow each layer to set before adding the next, especially when adding toppings like whipped cream or chocolate drizzle.
- Apply Just Before Serving: For best results, add garnishes and toppings right before serving.
FAQs About Raspberry No-Bake Split Cake
Can I Use Frozen Raspberries?
Yes! Thaw them completely and pat dry to prevent excess moisture from affecting the layers.
How Long Should the Cake Chill?
Refrigerate the cake for at least 4 hours. Overnight chilling ensures optimal flavor and structure.
Can I Make This Dessert Ahead of Time?
Absolutely. Prepare it the night before, and store it covered in the refrigerator until serving.
What’s the Best Substitute for Cream Cheese?
Mascarpone cheese is a great alternative, offering a rich and creamy texture.
How Can I Make It Gluten-Free?
Replace the graham crackers with gluten-free cookie crumbs or nut-based crusts.
Why You’ll Love This Dessert
The Raspberry No-Bake Split Cake isn’t just a dessert—it’s a showstopper that ticks all the right boxes for flavor, convenience, and versatility. Here’s why it will quickly become a favorite:
1. No Baking Required
- Perfect for hot days when you don’t want to heat up the kitchen.
- Ideal for beginners and seasoned bakers alike, with no complex techniques involved.
2. Fresh and Vibrant Flavors
- Combines the sweetness of bananas, the tanginess of raspberries, and the creaminess of the filling for a balanced flavor profile.
- The chocolate drizzle and crunchy nuts add richness and texture.
3. Customizable to Your Preferences
- Easily adaptable for dietary needs, including gluten-free or reduced-sugar versions.
- Swap out ingredients like fruits, crusts, or toppings to make it uniquely yours.
4. A Visual Masterpiece
- The layers of fruit, cream, and crust create a stunning visual appeal, making it perfect for gatherings and parties.
- Garnishes like whipped cream, mint leaves, or edible flowers elevate its presentation.
5. Make-Ahead Convenience
- Prepares easily in advance, leaving you more time to focus on other dishes or hosting duties.
- Stays fresh in the fridge for up to two days, maintaining its flavor and structure.
6. Family and Crowd-Pleasing
- Appeals to all ages with its mix of familiar flavors and creamy texture.
- A great way to include fresh fruits in a dessert, offering a hint of healthiness amid the indulgence.

Raspberry No-Bake Split Cake
- Total Time: 20 minutes
- Yield: 8 servings
- Diet: Vegetarian
Description
A refreshing, layered dessert with a graham cracker crust, creamy filling, and vibrant raspberry and banana toppings. Perfect for any occasion, and no oven required!
Ingredients
- Graham cracker crumbs (or gluten-free alternative)
- Melted butter
- Granulated sugar (optional)
- Cream cheese (softened)
- Powdered sugar
- Heavy whipping cream (or pre-made whipped topping)
- Vanilla extract (optional)
- Fresh raspberries (or thawed, dried frozen raspberries)
- Sliced bananas
- Optional: strawberries, blueberries, or blackberries
- Chocolate syrup or melted chocolate
- Crushed nuts (e.g., pecans or almonds)
- Whipped cream
- Fresh mint leaves for garnish
Instructions
- Combine graham cracker crumbs, melted butter, and optional sugar. Mix until the texture resembles wet sand and press into the bottom of a springform pan. Chill for 15 minutes.
- Beat cream cheese and powdered sugar until smooth. Gradually add heavy whipping cream, beating until light and fluffy. Add vanilla extract if desired. Spread half of the mixture over the crust.
- Layer sliced bananas and fresh raspberries over the cream filling. Add other fruits for variety, if desired.
- Spread the remaining cream filling on top. Repeat fruit layers for a taller cake.
- Top with chocolate drizzle, crushed nuts, and whipped cream. Chill for 4–6 hours, or overnight.
- Remove the springform pan carefully and serve.
Notes
Customize with different fruits, crusts, or lower-sugar ingredients for a tailored dessert experience.
- Prep Time: 20 minutes
- Cook Time: 0 minutes
- Category: Dessert
- Method: No-Bake
- Cuisine: American
Nutrition
- Serving Size: 1 slice
- Calories: 350
- Sugar: 22g
- Sodium: 150mg
- Fat: 20g
- Saturated Fat: 12g
- Unsaturated Fat: 6g
- Trans Fat: 0g
- Carbohydrates: 38g
- Fiber: 3g
- Protein: 4g
- Cholesterol: 60mg
Keywords: raspberry no-bake split cake, no-bake dessert, raspberry banana dessert