Easy Cat-Shaped Coasters for Beginners
If you are looking for a small crochet project that is cute, practical, beginner-friendly, and quick to make, these crochet cat coasters are a great choice.
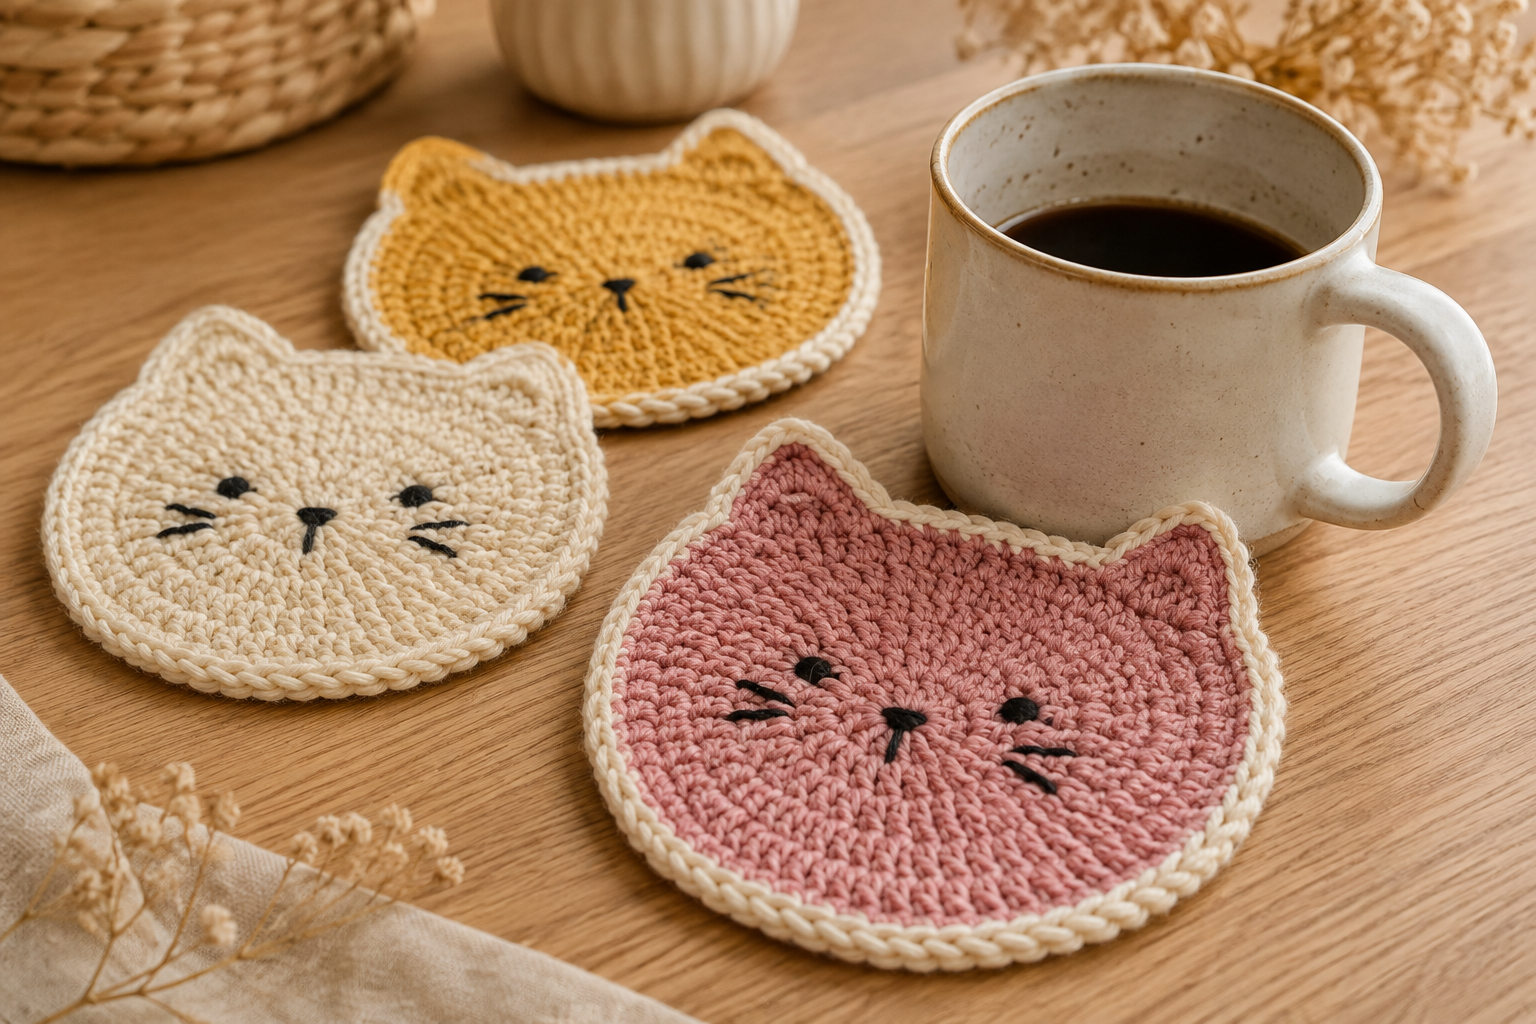
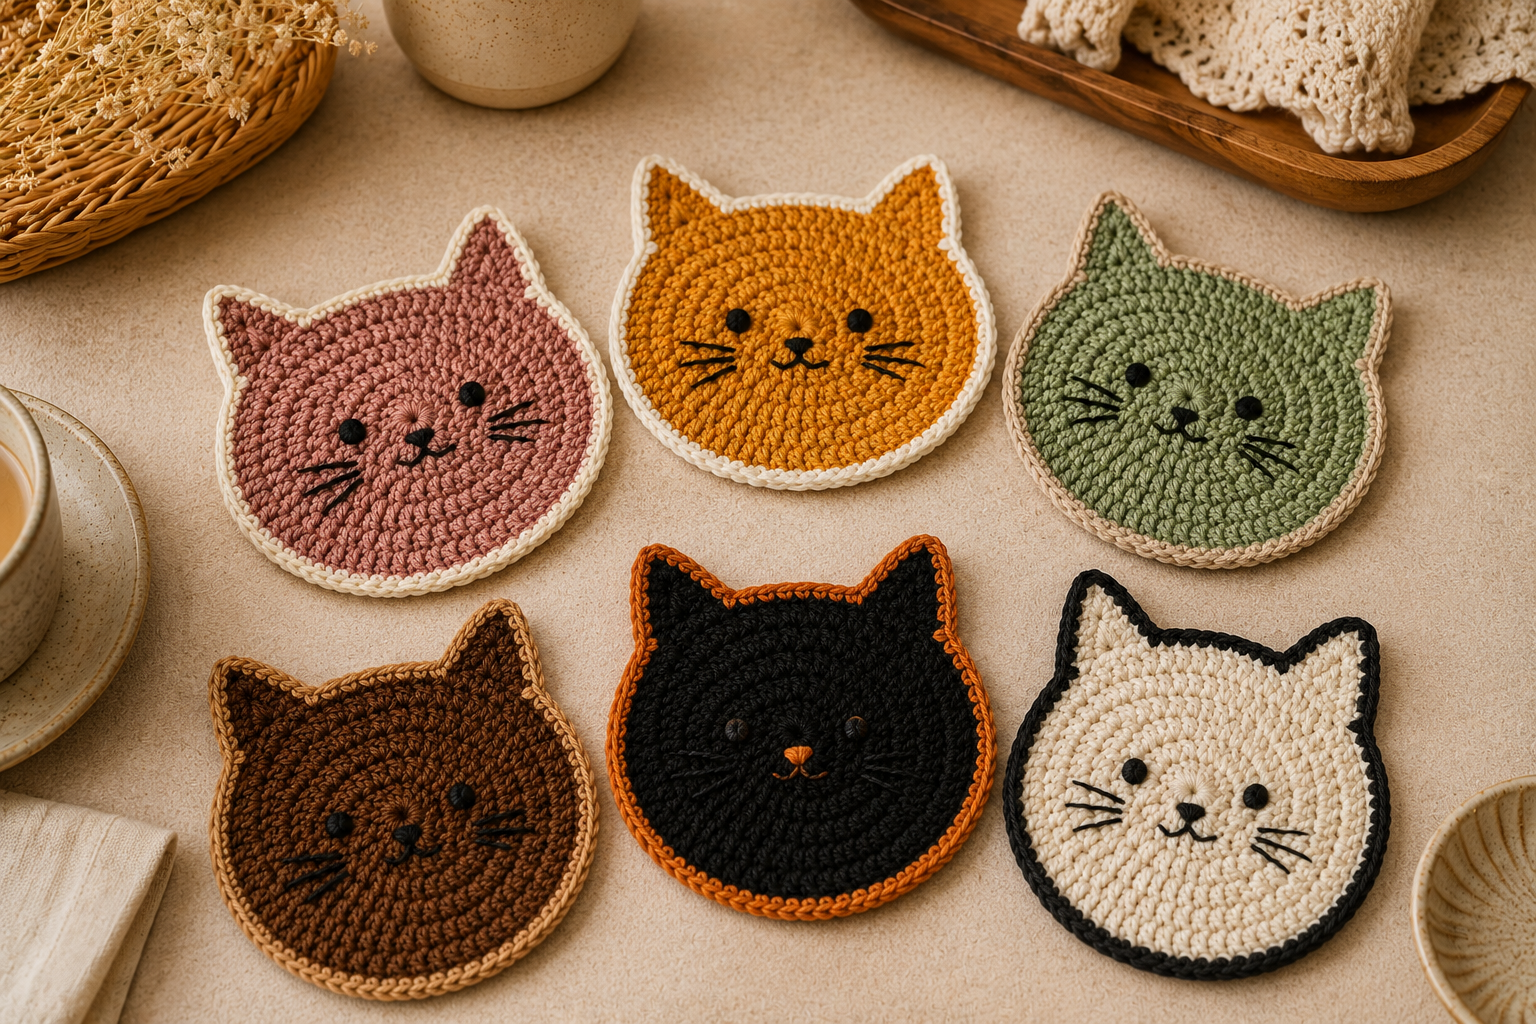
The design features a simple rounded cat-head shape with two pointed ears. You can make the coaster in one color for a minimalist look or use contrasting colors for the border, ears, eyes, and nose.
These coasters are also an excellent scrap-yarn project. Each one uses only a small amount of yarn, so you can turn leftover cotton yarn into a useful piece of handmade home décor.
Make one for your coffee station, create a set of four for the dining table, or crochet several in different colors as a handmade gift for a cat lover.
Pattern note: This is an original beginner-friendly pattern created around the cat-shaped coaster concept shown in the inspiration image. It is written from scratch rather than reproducing another designer’s written instructions.
Table of Contents
- Why You’ll Love This Pattern
- Crochet Cat Coaster Details
- Materials You’ll Need
- Choosing the Best Yarn
- Choosing Your Crochet Hook
- Crochet Abbreviations
- Gauge and Finished Size
- Before You Start
- Free Crochet Cat Coaster Pattern
- Making the Main Cat Head
- Making the Cat Ears
- Attaching the Ears
- Adding the Border
- Adding a Cat Face
- How to Keep Your Coaster Flat
- Troubleshooting Guide
- Color Ideas
- Halloween Black Cat Variation
- How to Make a Matching Set
- How to Make a Larger Cat Mat
- Gift Ideas
- Care Instructions
- Crochet Safety and Heat Considerations
- Quick Printable Pattern
- Frequently Asked Questions
- Related Crochet Projects
- Final Thoughts
Why You’ll Love This Crochet Cat Coaster
There is something especially satisfying about small crochet projects. You can start one in the evening and have a finished piece without committing to a large blanket, garment, or complicated amigurumi project.
These cat coasters are especially useful because they are:
- Beginner-friendly
- Quick to crochet
- Inexpensive
- Great for leftover yarn
- Easy to customize
- Useful around the home
- Suitable for handmade gifts
- Easy to make as a matching set
The simple silhouette also means you can experiment with colors without having to learn a complicated stitch pattern.
Crochet Cat Coaster Details
| Feature | Details |
|---|---|
| Skill level | Beginner |
| Project type | Crochet coaster |
| Shape | Cat head |
| Main stitch | Single crochet |
| Yarn | Medium-weight cotton |
| Hook | 3.5–4 mm |
| Approximate size | 10–12 cm |
| Construction | Main head + 2 ears |
| Border | Single crochet |
| Face | Optional embroidery |
| Blocking | Optional |
| Sewing | Ears and optional facial details |
| Yarn amount | Approximately 15–25 g per coaster |
The finished size will vary according to your yarn, hook size, and crochet tension.
Materials You’ll Need
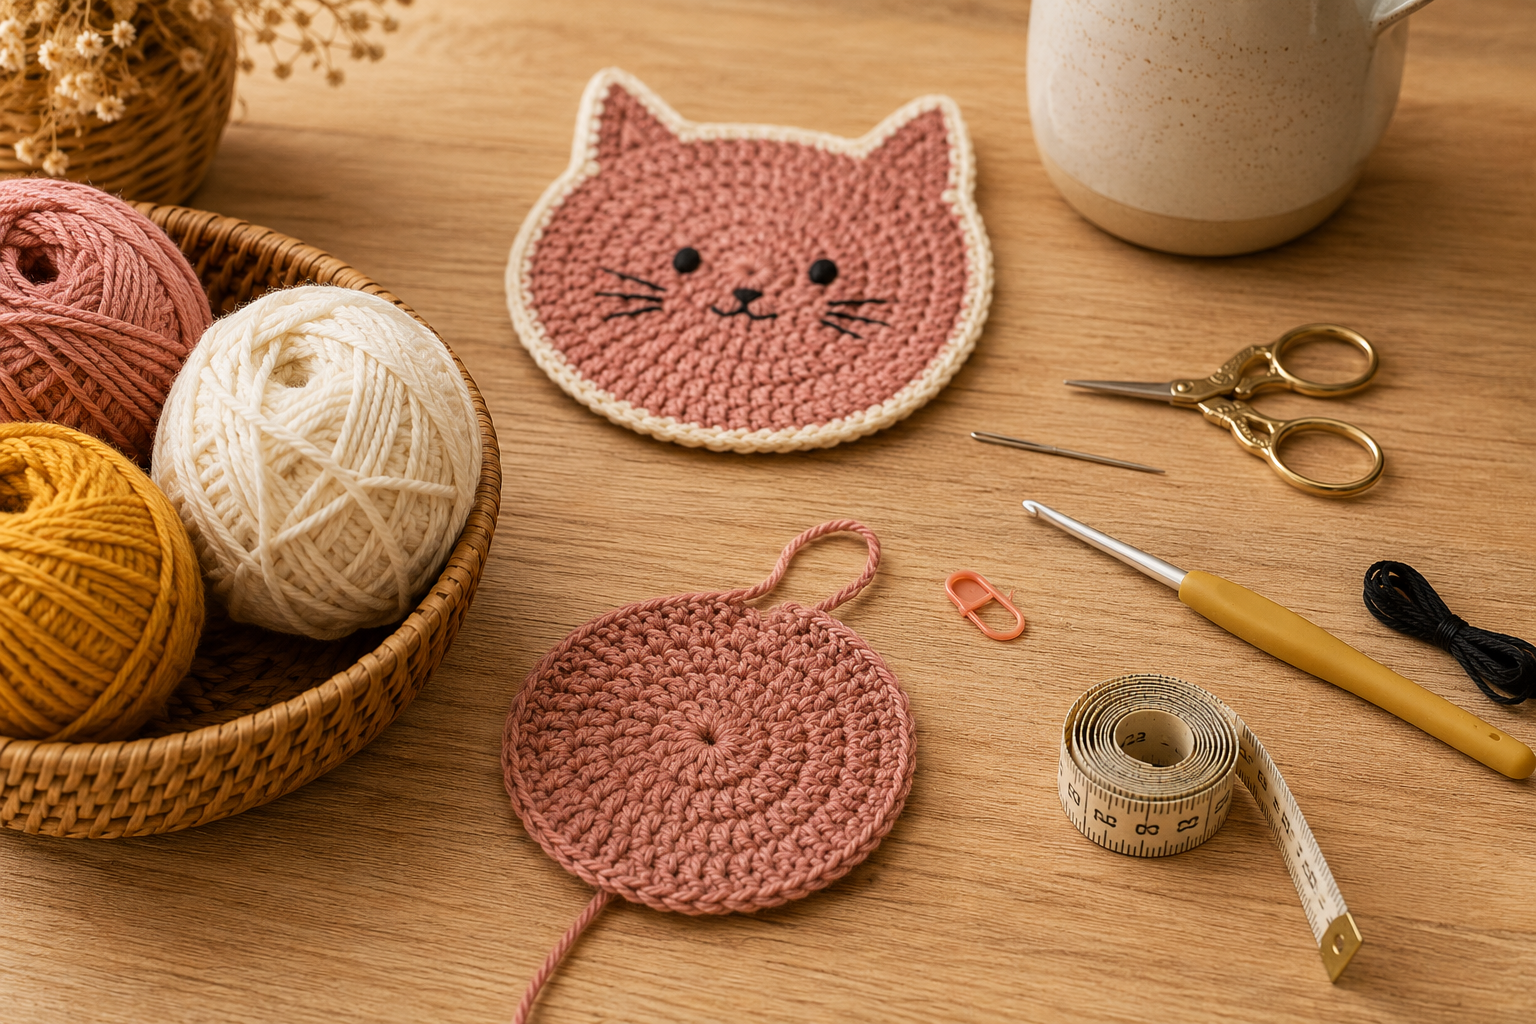
For one crochet cat coaster, you’ll need:
- 15–25 g medium-weight cotton yarn
- 3.5–4 mm crochet hook
- Tapestry needle
- Scissors
- Stitch marker
- Measuring tape
For the optional face:
- Small amount of black embroidery thread
- Small amount of pink yarn or embroidery thread
For blocking:
- Blocking mat or clean towel
- Rust-resistant pins
- Spray bottle
You don’t need many supplies, which makes this an excellent project for using materials you already have at home.
Choosing the Best Yarn for a Crochet Coaster
For functional coasters, cotton yarn is my first choice.
Cotton has several qualities that make it particularly suitable:
- It holds its shape well.
- It has relatively little stretch.
- The stitches are easy to see.
- It is generally easy to wash.
- It gives the coaster a firm, stable fabric.
A smooth cotton yarn is especially helpful for beginners because you can clearly see where to insert your hook.
What about acrylic yarn?
Acrylic can be used for decorative versions of this project, but it isn’t automatically suitable for use with hot items.
If you plan to put hot mugs or dishes on the finished coaster, always check the manufacturer’s recommendations for the yarn you are using.
For everyday drink coasters, cotton is the safer practical choice.
Choosing the Right Crochet Hook
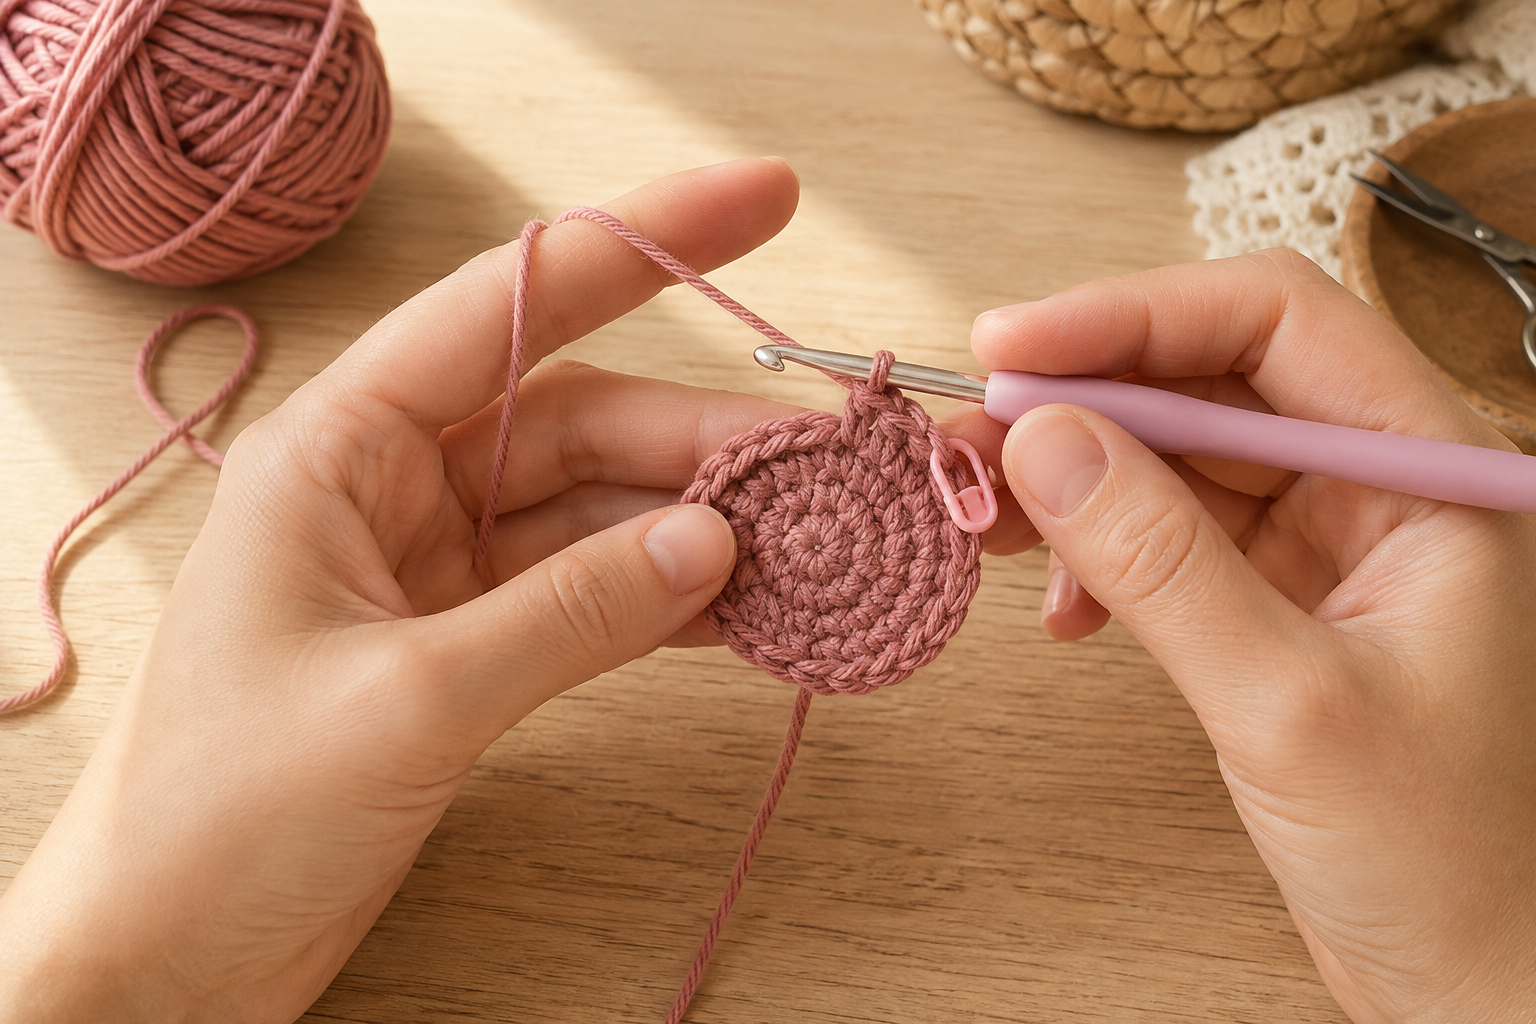
A 3.5–4 mm crochet hook is a good starting point for medium-weight cotton yarn.
The goal is to create fabric that is:
- Firm
- Relatively flat
- Not excessively stiff
- Dense enough that the coaster holds its shape
If your stitches are extremely tight and the fabric curls, try a slightly larger hook.
If your fabric feels loose and floppy, try a slightly smaller hook.
Crochet Abbreviations
This pattern uses standard US crochet terminology.
| Abbreviation | Meaning |
|---|---|
| ch | Chain |
| sc | Single crochet |
| sl st | Slip stitch |
| inc | Increase: 2 sc in the same stitch |
| dec | Decrease: sc 2 stitches together |
| st | Stitch |
| sts | Stitches |
| FO | Fasten off |
Pattern Example
(sc, inc) × 6
means:
Crochet 1 single crochet in the next stitch, then 2 single crochet in the following stitch. Repeat that sequence six times.
Gauge and Finished Size
Gauge is not particularly important for this project.
Instead, focus on creating a firm, flat fabric.
With medium-weight cotton yarn and a 3.5–4 mm hook, the finished coaster should measure approximately:
10–12 cm (4–4¾ inches)
If yours is slightly larger or smaller, that’s perfectly fine.
For a coaster, consistency and flatness are more important than achieving an exact measurement.
Before You Start
There are three things that will make this project much easier.
Count your stitches
A single accidental increase can change the shape of the coaster.
Keep your tension consistent
Try to maintain approximately the same tension throughout the project.
Plan the ears before sewing
The ears determine whether the finished piece immediately looks like a cat.
Always position both ears first and sew them only after you’re happy with their placement.
Free Crochet Cat Coaster Pattern
The coaster is made from:
- One rounded main head
- Two triangular ears
- One optional border
- Optional embroidered facial features
The main head is worked in the round. The ears are crocheted separately and attached afterward.
This construction makes the pattern easier to follow and gives you more control over the final cat silhouette.
Part 1: Crochet the Main Cat Head
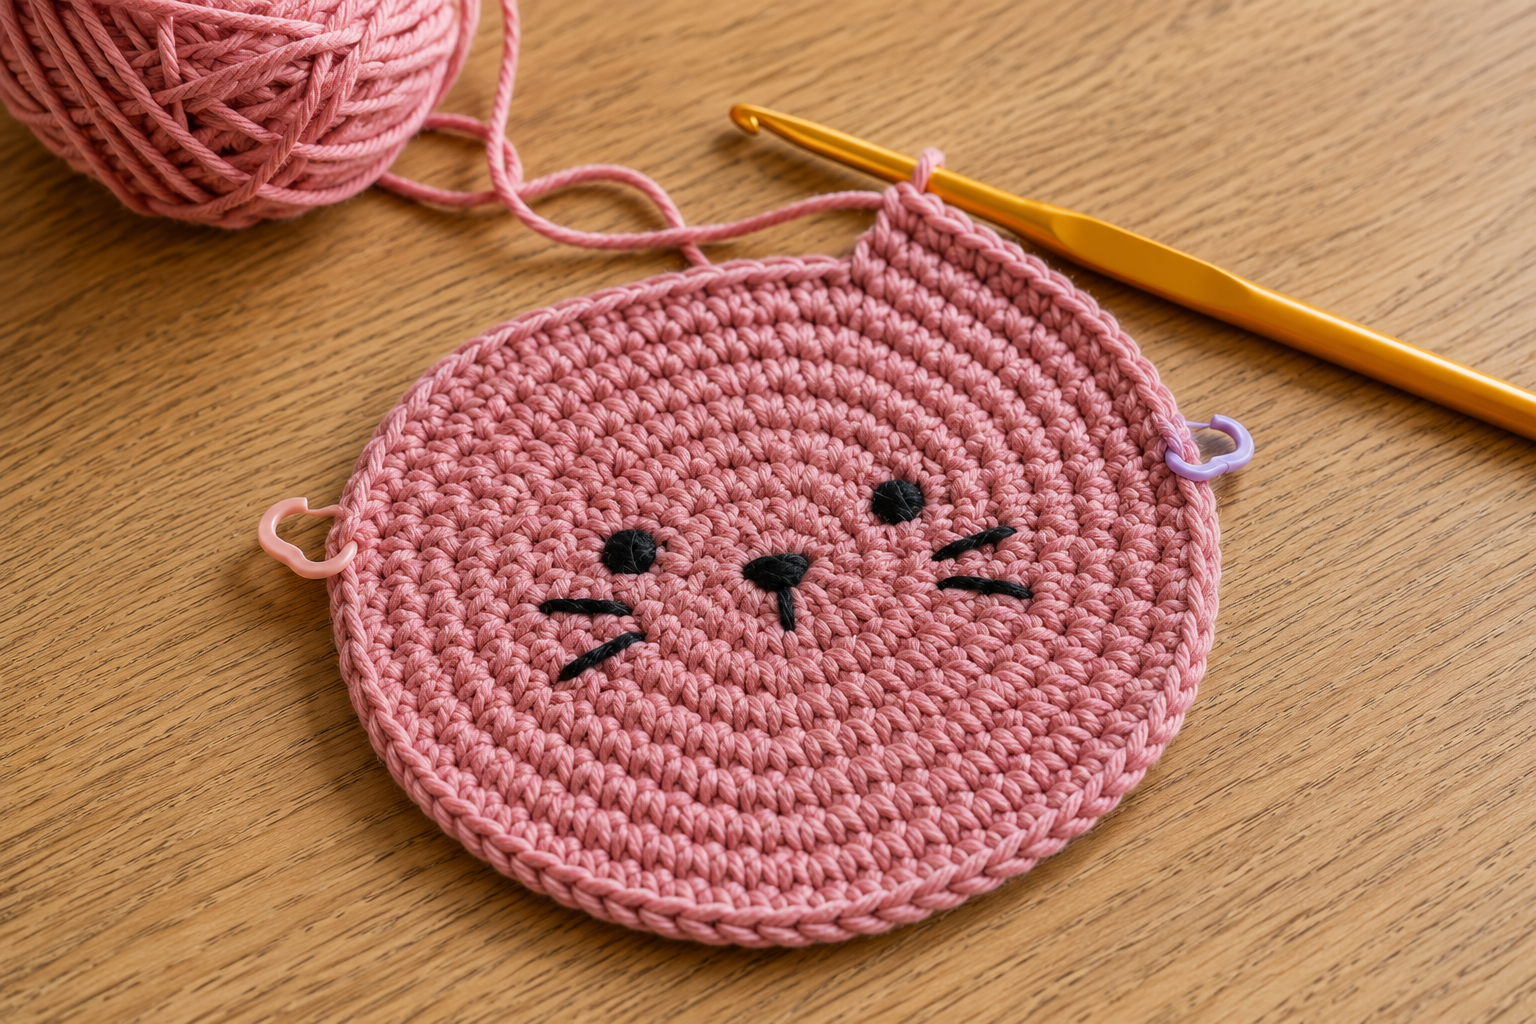
Choose your main yarn color.
Begin with a magic ring.
Round 1
Work 6 sc into the magic ring.
Pull the ring closed.
6 sts
Round 2
Work inc in each stitch around.
12 sts
Round 3
Repeat:
(sc, inc) × 6
18 sts
Round 4
Repeat:
(2 sc, inc) × 6
24 sts
Round 5
Repeat:
(3 sc, inc) × 6
30 sts
Round 6
Repeat:
(4 sc, inc) × 6
36 sts
Round 7
Repeat:
(5 sc, inc) × 6
42 sts
Round 8
Work:
42 sc
Round 9
Work:
42 sc
Round 10
Work:
42 sc
Fasten off and weave in the starting yarn tail.
At this stage, you should have a firm, rounded crochet piece.
It won’t look exactly like a cat yet. The ears will create the recognizable silhouette.
Part 2: Crochet the Cat Ears
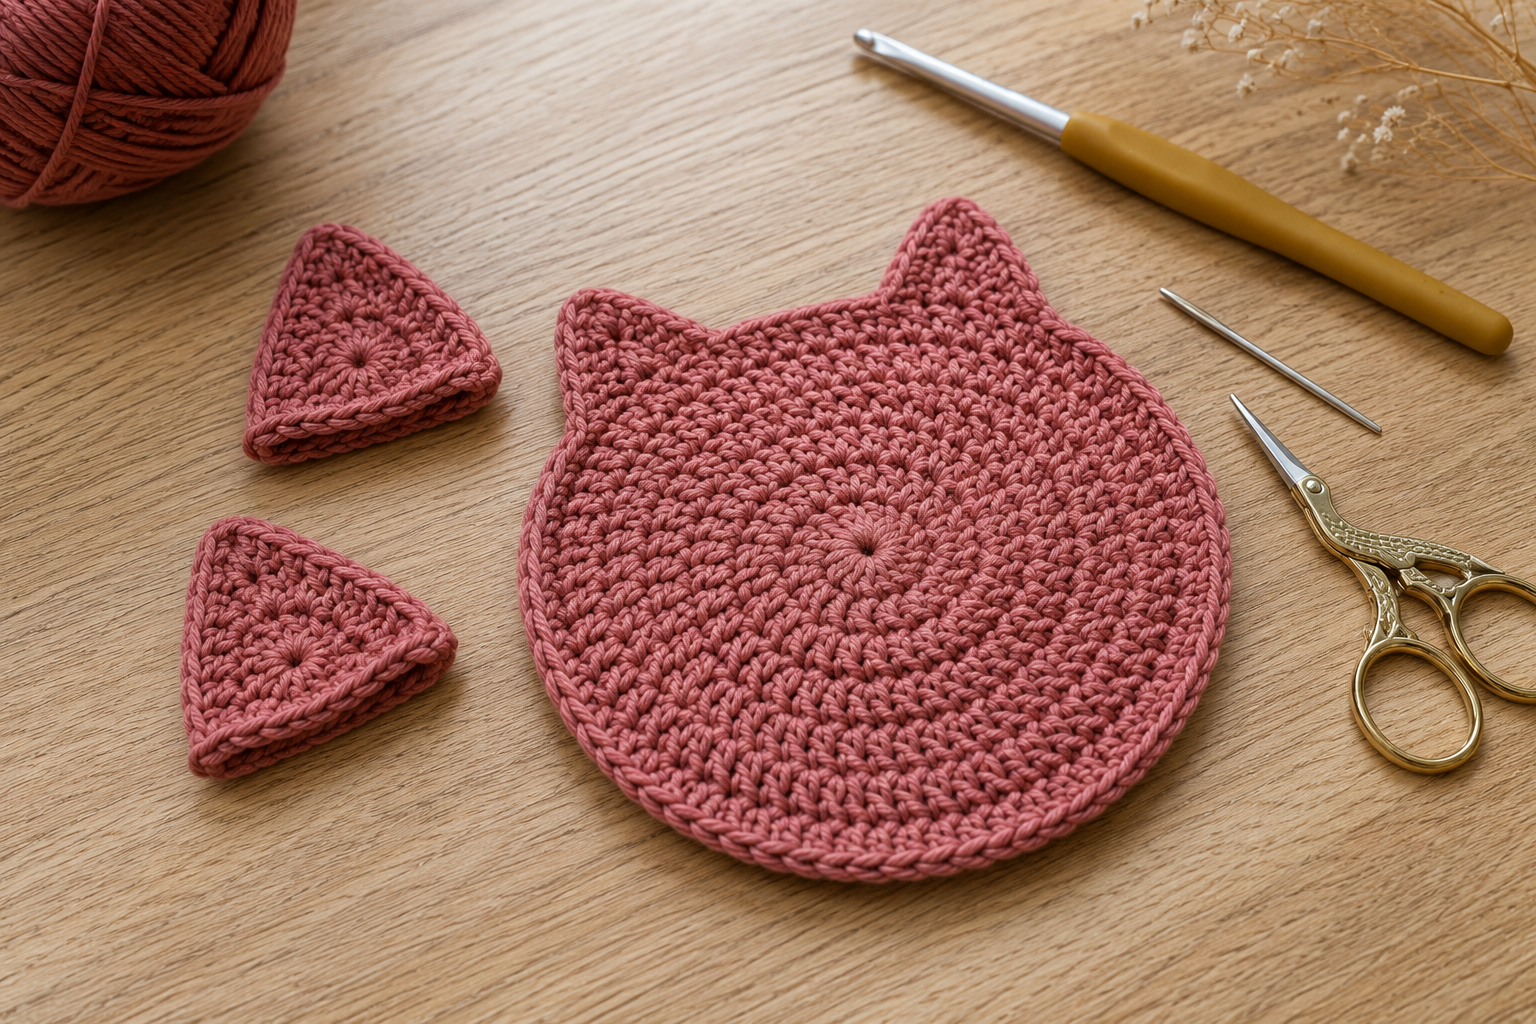
Make 2 ears using the same yarn color as the head.
The ears are worked in rows.
Ear Pattern
Chain 8.
Row 1
Starting in the second chain from the hook:
7 sc
Turn.
Row 2
Ch 1.
6 sc
Turn.
Row 3
Ch 1.
dec, 4 sc
5 sts
Turn.
Row 4
Ch 1.
dec, 3 sc
4 sts
Turn.
Row 5
Ch 1.
dec, 2 sc
3 sts
Turn.
Row 6
Ch 1.
dec, 1 sc
2 sts
Turn.
Row 7
Ch 1.
dec
1 st
Fasten off.
Leave a long yarn tail for sewing.
Repeat the entire ear pattern to make the second ear.
Part 3: Position the Ears
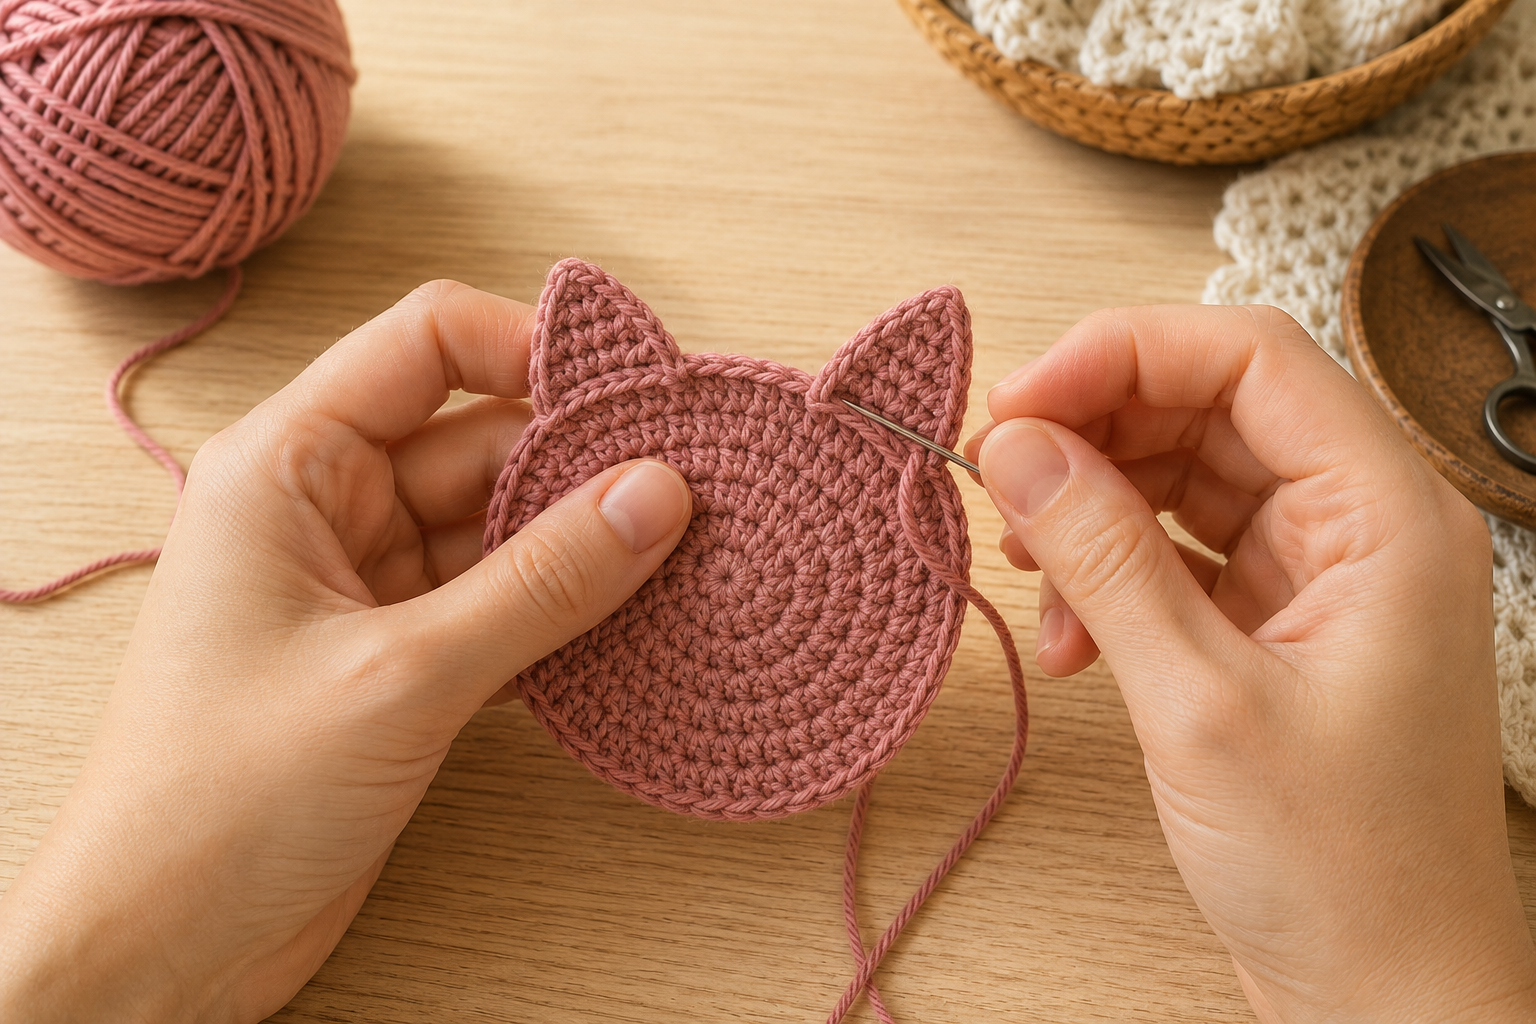
This is the stage where your coaster starts looking like a cat.
Place the two ears along the upper edge of the main head.
Don’t sew them immediately.
Instead, use pins or stitch markers to temporarily hold them in position.
Look at the coaster from directly above and from the front.
Try to keep:
- Both ears approximately the same height
- Similar spacing from the center
- Similar angles
- The bases of the ears securely overlapping the head
If one ear looks higher than the other, adjust it before sewing.
Sewing the Ears
Thread the long yarn tail onto your tapestry needle.
Insert the needle through the base of the ear and then through the edge of the main head.
Continue taking small stitches across the entire base.
Pull the yarn firmly enough to secure the ear, but don’t pull so tightly that the head puckers.
Fasten off on the back.
Weave the remaining yarn through several stitches and trim the excess.
Repeat with the second ear.
Part 4: Add a Crochet Border
A border is optional, but I highly recommend it.
It helps:
- Define the cat shape
- Strengthen the outer edge
- Give the coaster a more finished appearance
- Add a contrasting color
- Hide minor inconsistencies around the edge
Choose either the same color or a contrasting shade.
Attach the yarn anywhere along the outside edge.
Work sc evenly around the entire coaster.
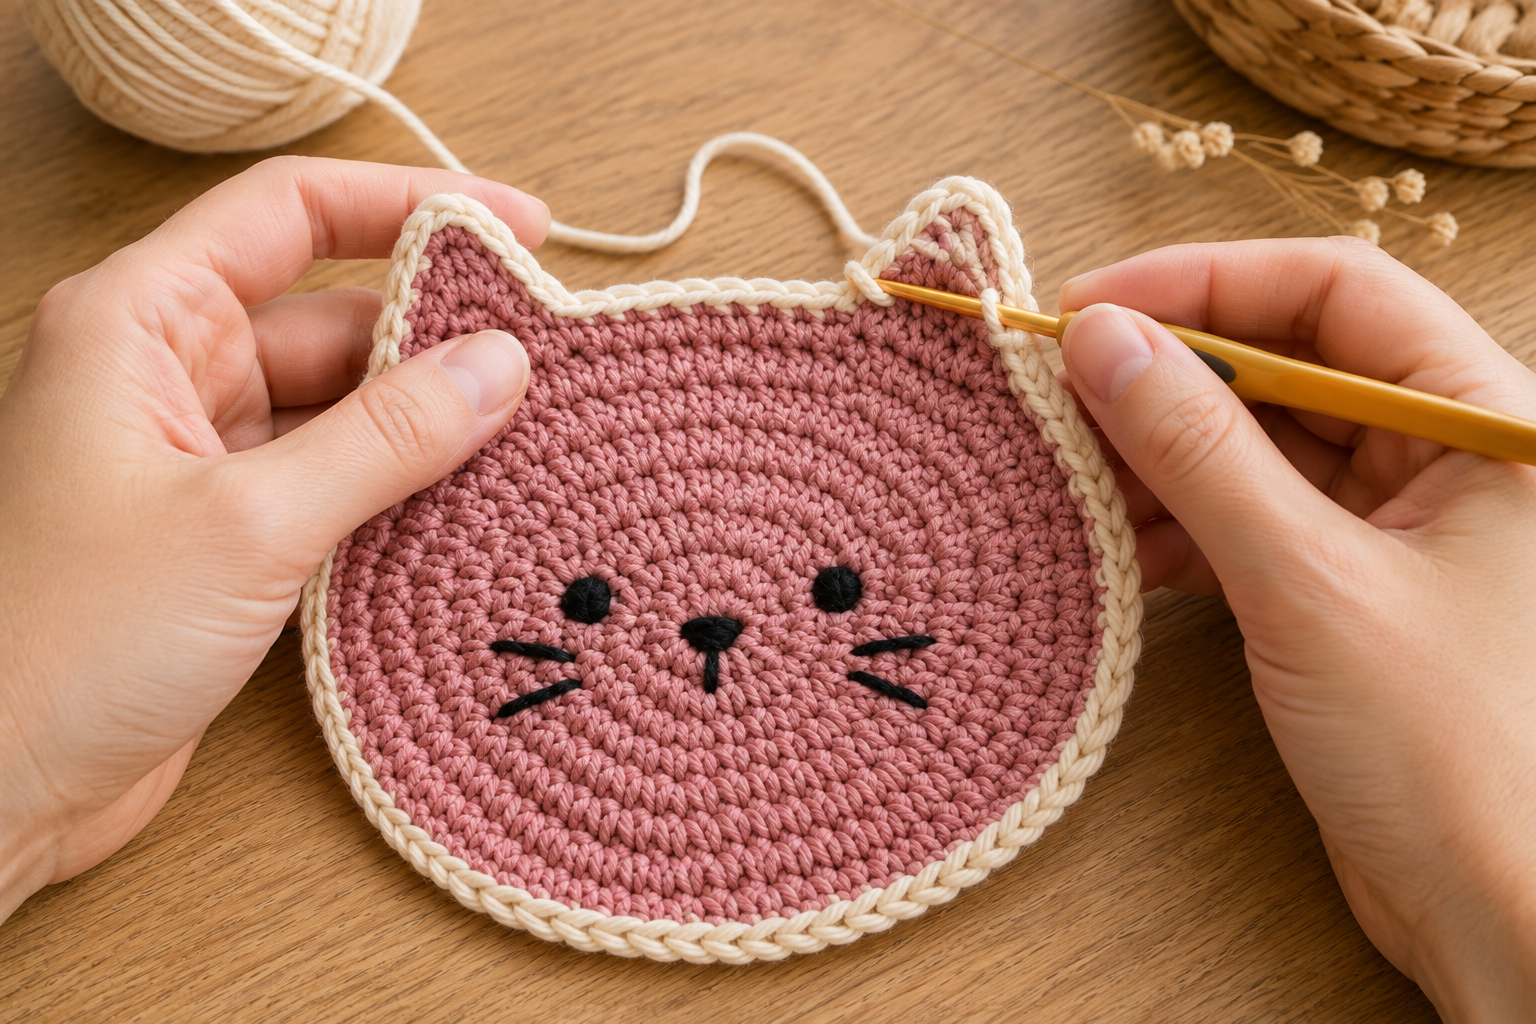
Around the Cat Ears
When you reach the point of an ear, you may need to work 2 or 3 sc near the tip to prevent the edge from pulling inward.
Don’t automatically add a large number of stitches.
The correct number depends on your tension and the size of your ear.
At the indentation between the ears, work carefully into the available edge stitches.
The objective is a smooth outline without excessive fabric or puckering.
Join the border with a sl st.
Fasten off and weave in the ends.
Optional Second Border
If you’d like a slightly heavier coaster, add another round of single crochet.
A second border works particularly well when:
- Your yarn is thin
- You want a stronger edge
- You want the border color to stand out
- You’re making a gift set
For a minimalist coaster, one round is enough.
Adding a Simple Cat Face
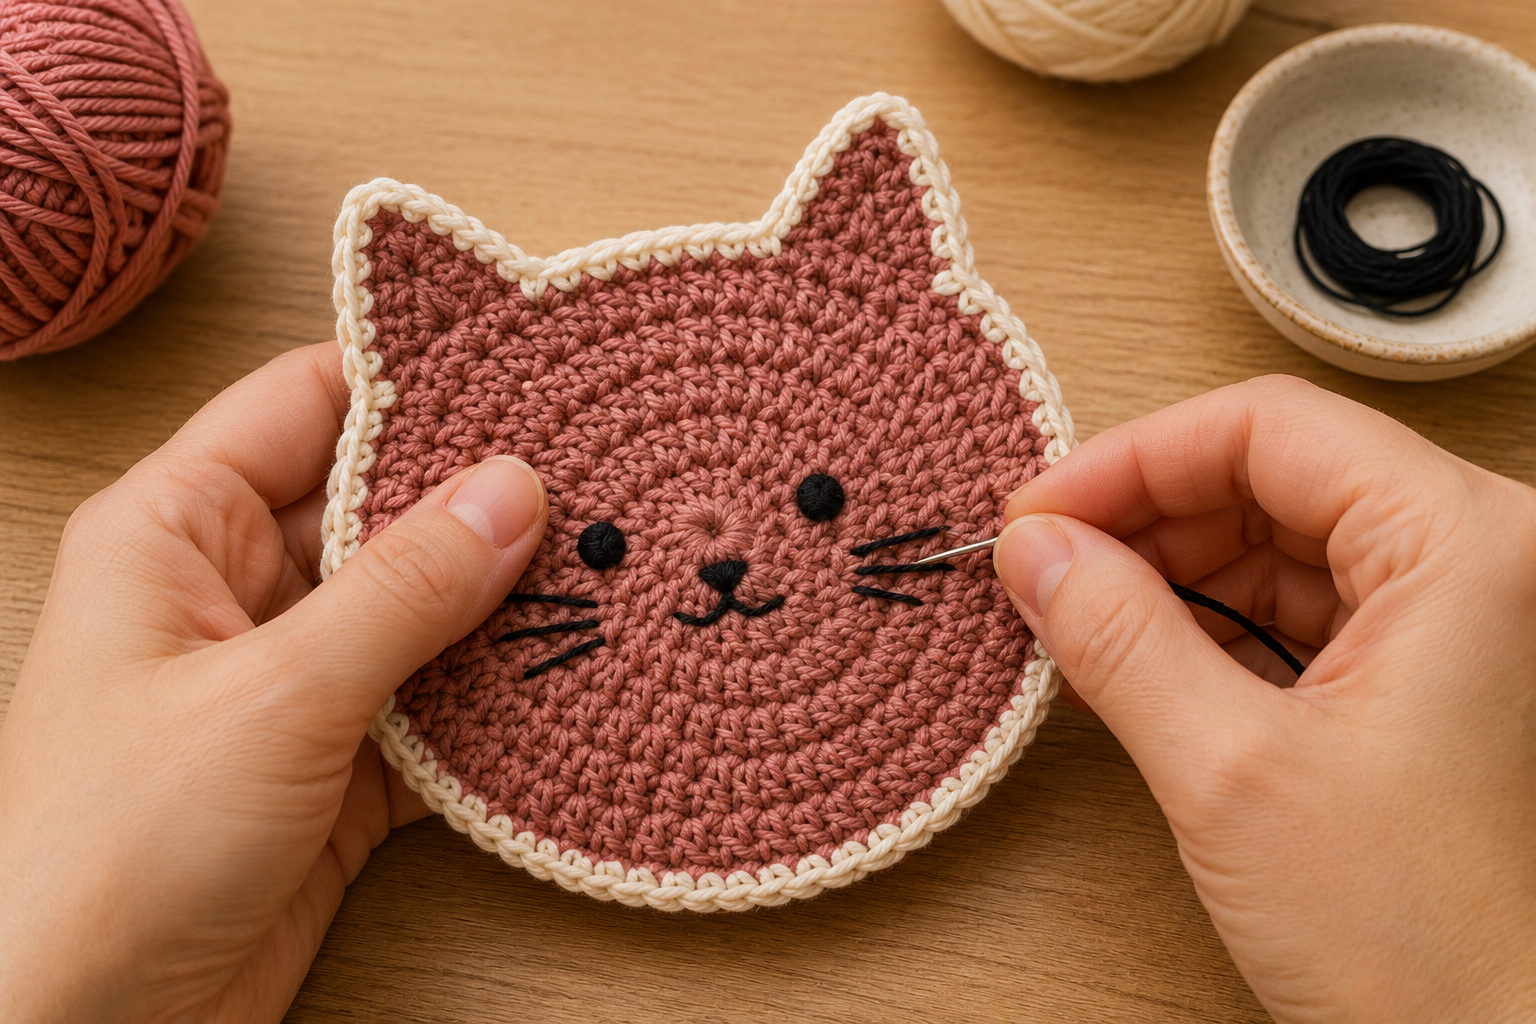
The cat silhouette works perfectly without facial features.
But if you want something more playful, add a small embroidered face.
Eyes
Use black embroidery thread.
Place two small eyes approximately the same distance from the center.
Before embroidering, mark the positions with pins so you can check the symmetry.
Nose
Add a tiny triangular nose in the center.
Pink, black, brown, or dark gray all work well.
Mouth
From the bottom of the nose, add two short embroidered lines.
Whiskers
Add two or three short lines on each side of the face.
Keep the whiskers relatively small.
On a 10–12 cm coaster, oversized whiskers can overwhelm the simple design.
Simple Cat Face Layout
| Feature | Suggested Placement |
|---|---|
| Eyes | Upper-middle section |
| Nose | Centered between eyes |
| Mouth | Directly below nose |
| Whiskers | Two or three per side |
| Cheeks | Optional, below eyes |
You can make every coaster in a set have a slightly different expression.
How to Keep Your Crochet Cat Coaster Flat
A coaster should sit flat underneath a mug or glass.
If yours is curling or becoming wavy, don’t worry. This is one of the most common issues with small crochet projects.
If the coaster curls
Your tension may be too tight.
Try using a slightly larger hook.
If the coaster waves
You may have too many stitches.
Check your stitch count carefully.
If the border pulls inward
Your border may be too tight.
Try loosening your tension or using a larger hook for the border.
If the ears curl
A light blocking treatment can help reshape them.
Blocking the Finished Coaster
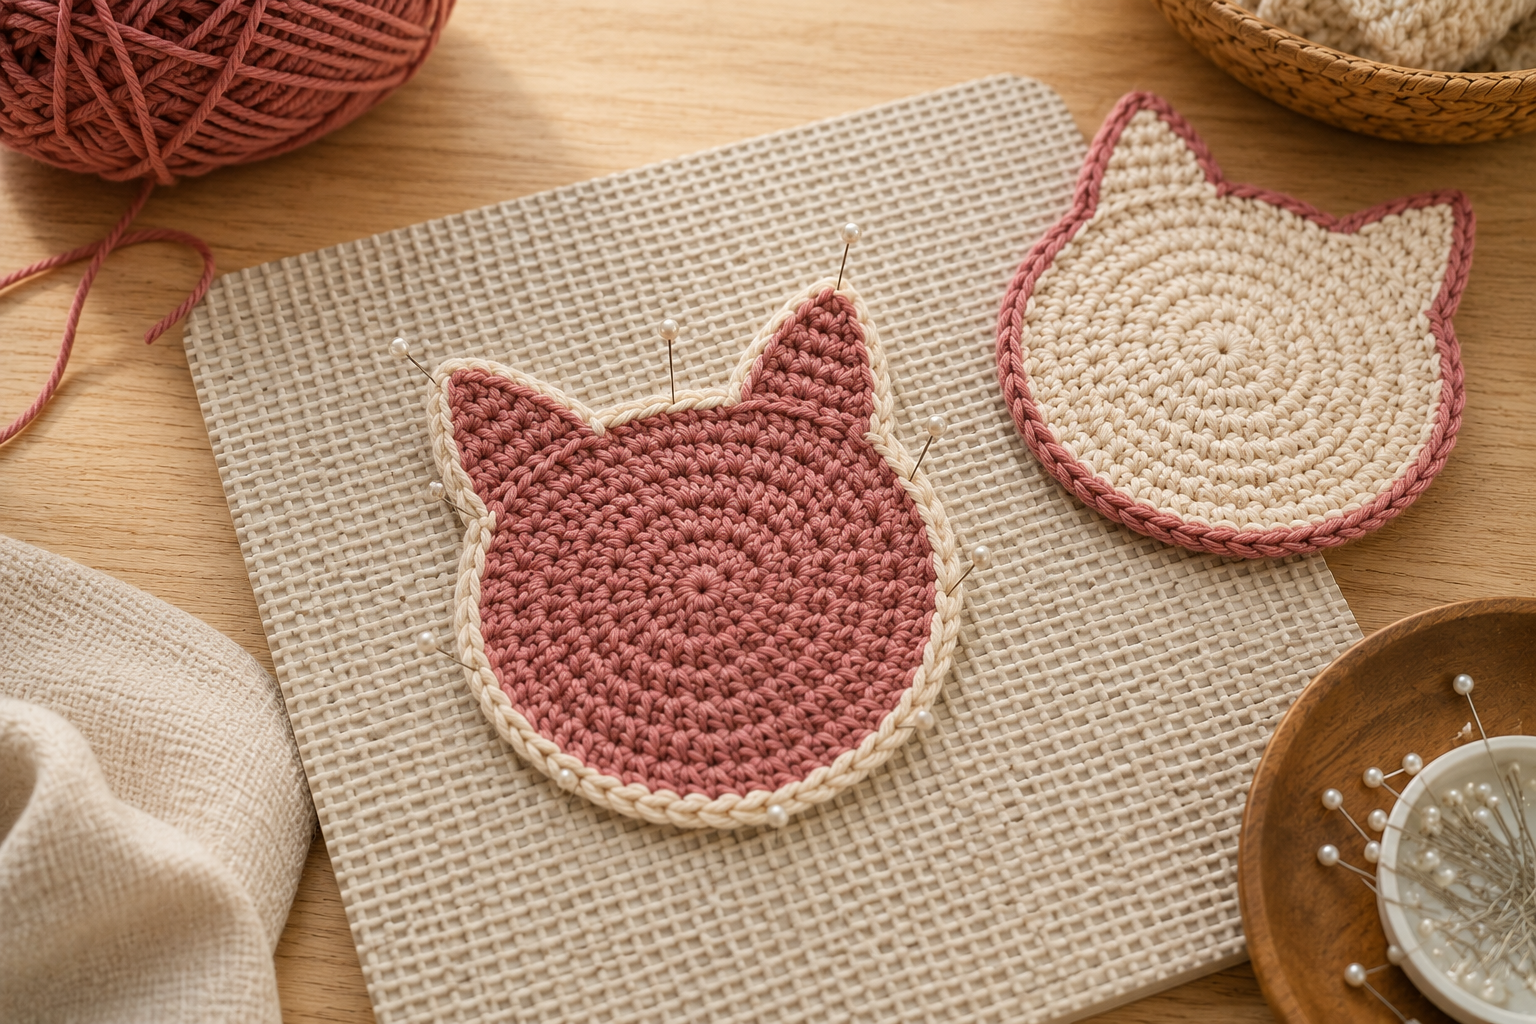
Blocking is optional, but it can make the finished project look considerably cleaner.
Step 1
Lightly dampen the coaster.
It doesn’t need to be soaking wet.
Step 2
Place it on a clean towel or blocking mat.
Step 3
Gently shape the lower rounded section.
Step 4
Straighten the ears.
Step 5
Pin around the outer edge.
Step 6
Allow it to dry completely.
Once dry, carefully remove the pins.
Blocking is particularly helpful if you’re making several coasters and want all of them to have approximately the same shape.
Troubleshooting Guide
| Problem | Possible Cause | What to Do |
|---|---|---|
| Coaster curls | Tension is too tight | Try a larger hook |
| Coaster waves | Too many stitches | Check stitch counts |
| One ear is larger | Rows were uneven | Count both ears |
| Ear looks rounded | Border is too tight | Relax tension |
| Stuff shows through | Stitches are too loose | Use a smaller hook |
| Face looks uneven | Features weren’t marked | Position them first |
| Coaster feels floppy | Yarn is too soft | Try cotton |
| Edge looks messy | Uneven border stitches | Work slowly around the edge |
Color Ideas for Crochet Cat Coasters
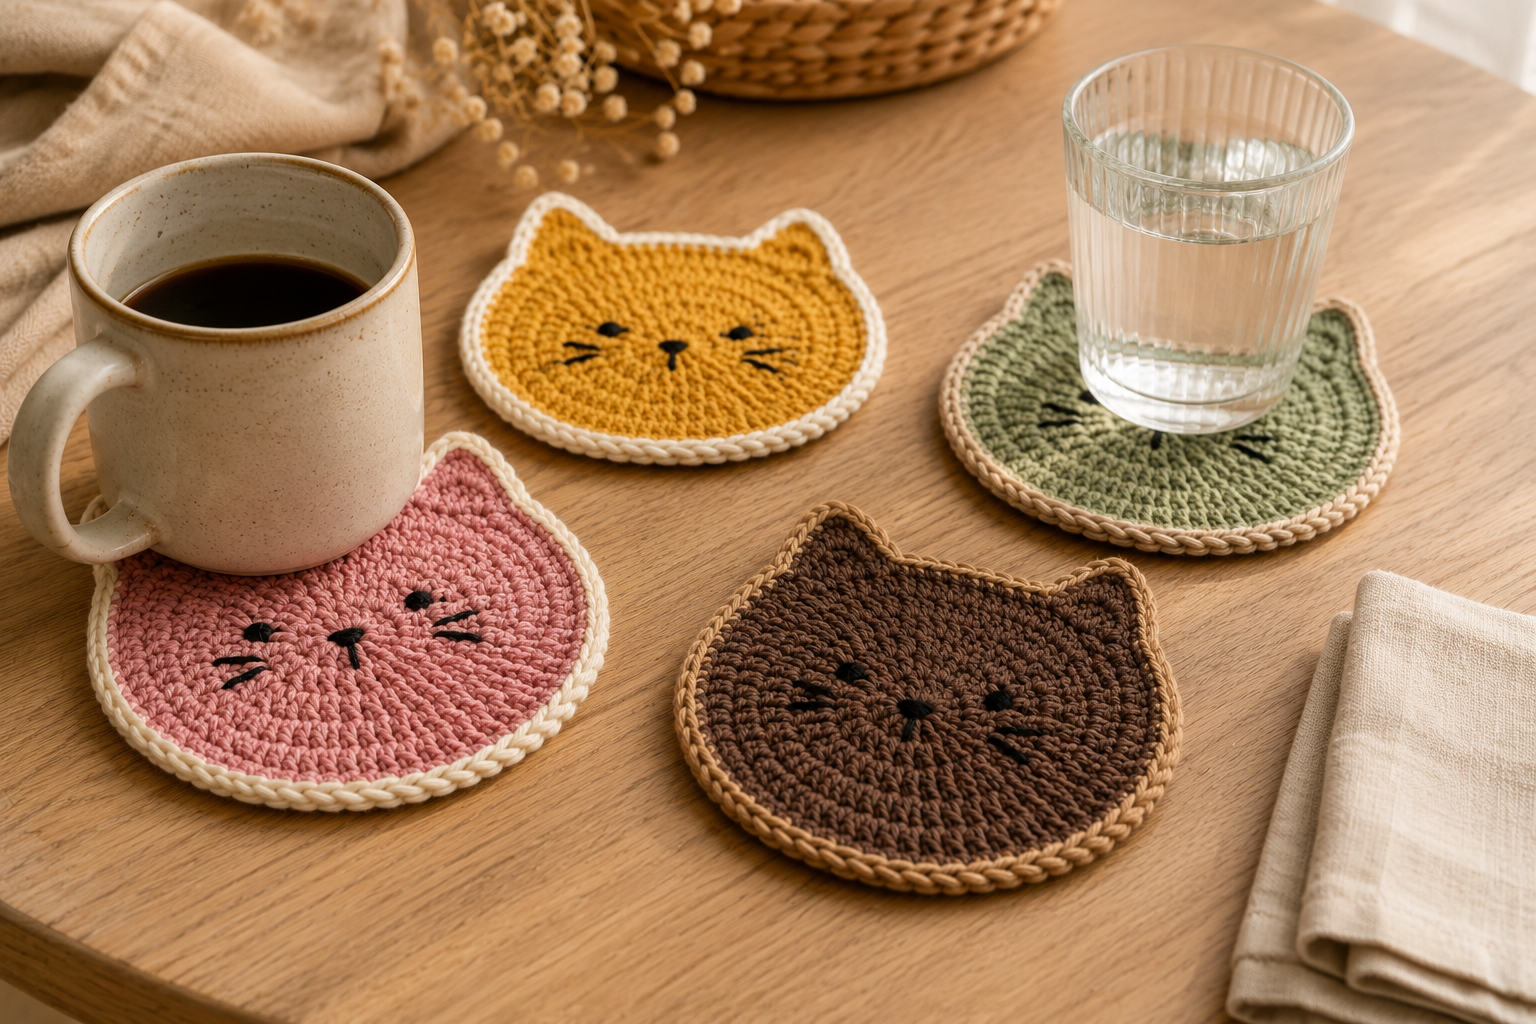
The simple design looks great in almost any color.
Dusty Rose and Cream
Use dusty rose for the cat and cream for the border.
This gives the coaster a soft, romantic look.
Mustard and White
Mustard yellow with a white border creates a warm, cheerful combination.
Chocolate Brown and Beige
Perfect for a neutral kitchen or coffee station.
Sage Green and Cream
A beautiful option for modern home décor.
Soft Blue and White
Fresh and simple for spring or summer.
Black and Orange
Perfect for Halloween.
Cream and Black
For a minimalist monochrome cat.
Halloween Black Cat Crochet Coaster
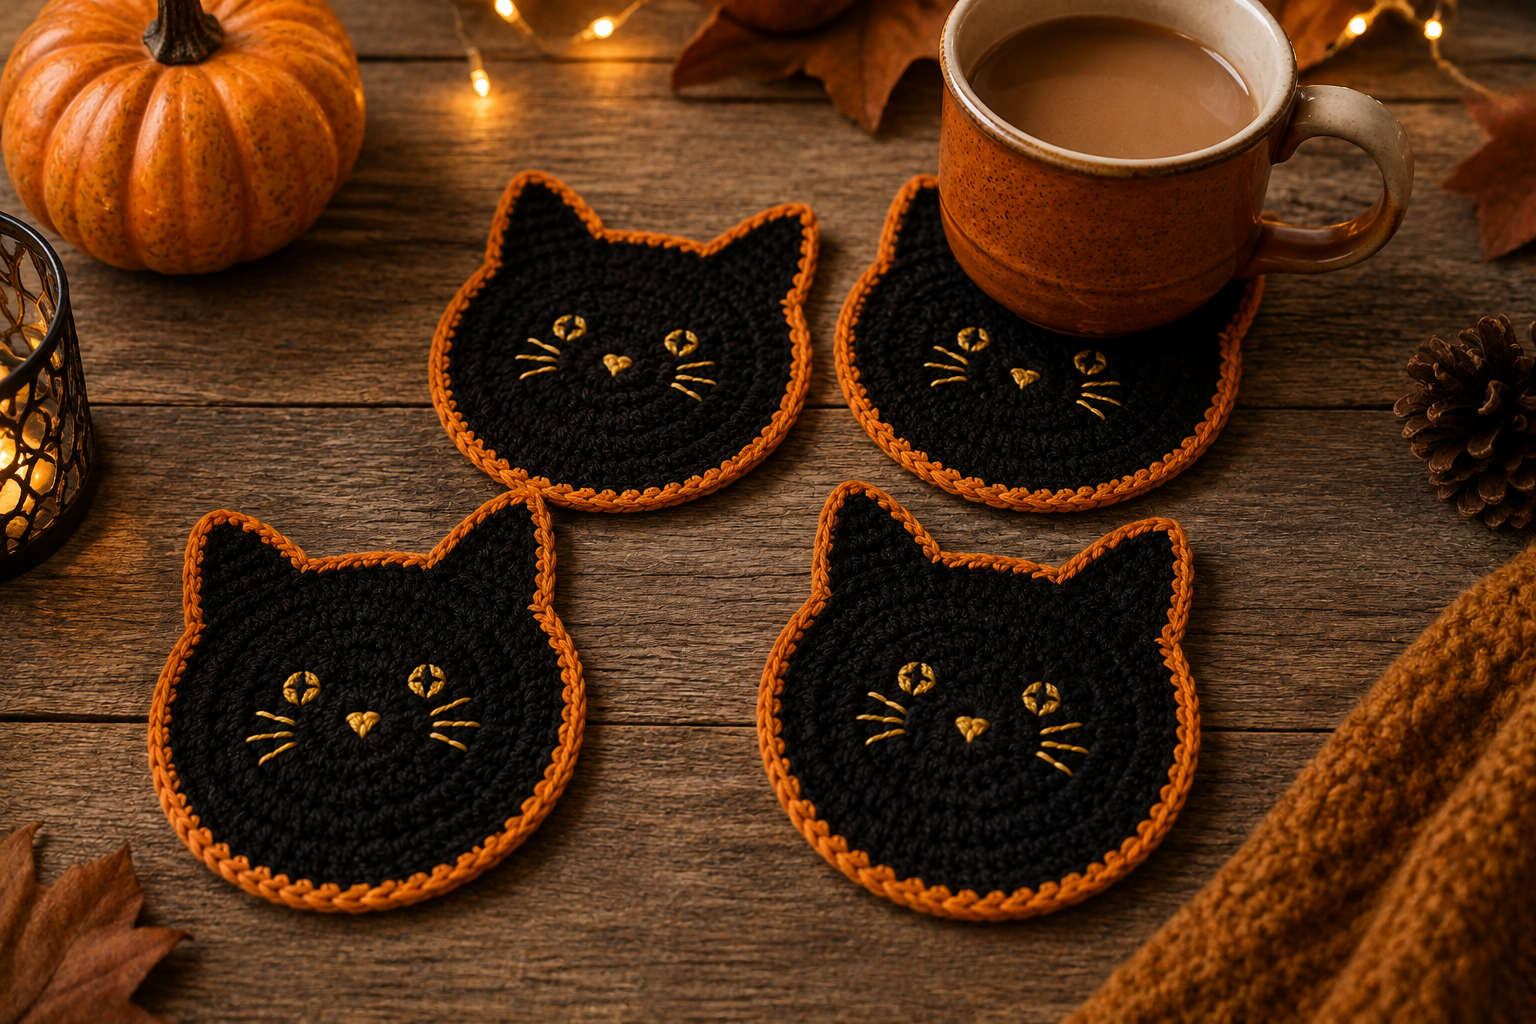
This pattern can easily become a seasonal project.
Make the cat:
- Black
Add:
- Orange border
- Golden eyes
- Tiny orange nose
You could even make a set of four black cats with different expressions.
They would look adorable on a Halloween coffee or dessert table.
Make a Matching Set
One cat coaster is cute.
A set makes an even stronger visual statement.
Try making four in different colors.
| Coaster | Main Color | Border |
|---|---|---|
| 1 | Dusty rose | Cream |
| 2 | Mustard | White |
| 3 | Sage | Beige |
| 4 | Chocolate | Caramel |
You can keep the pattern identical while changing only the colors.
This makes the project faster while still giving the finished set plenty of personality.
How Many Should You Make?
2 Coasters
Good for a bedside table or coffee station.
4 Coasters
A practical everyday set.
6 Coasters
Great for entertaining guests.
8 Coasters
A generous handmade gift set.
Turn the Pattern Into a Larger Cat Mat
The same basic concept can be enlarged.
Instead of stopping the main head after Round 10, continue increasing the circular section.
For example, you can add:
(6 sc, inc) × 6
followed by:
(7 sc, inc) × 6
Continue until you reach your desired width.
Then create larger ears that match the proportions of the enlarged head.
This can turn the small coaster into:
- A cat bowl mat
- Mug mat
- Decorative table mat
- Small placemat
For a large mat, remember that the ears should also be enlarged. Otherwise, the finished cat can look more like a circle with tiny ears.
Handmade Gift Idea
These cat coasters are an excellent small handmade gift because they don’t require much yarn or time.
Make a set of four and bundle them together with:
- Twine
- Ribbon
- Kraft paper
- A handmade gift tag
You could also pair the coasters with:
- A coffee mug
- Tea
- Coffee
- Hot chocolate
- A small candle
Cat Café Gift Set
For a fun themed gift, create a small Cat Café Set with four cat coasters and a mug.
This turns a simple crochet project into a complete handmade gift.
Care Instructions
Always follow the washing instructions provided for your specific yarn.
For cotton crochet coasters:
- Remove crumbs and debris.
- Spot clean small spills.
- Wash according to the yarn label.
- Reshape while damp.
- Allow the coaster to dry completely.
If the coaster becomes slightly misshapen after washing, gently reshape it while damp.
Crochet Safety and Heat Considerations
These coasters are intended primarily for drinks and decorative use.
Don’t assume that a particular yarn is heatproof simply because it is cotton or because it was used to make a coaster.
For very hot items, follow the yarn manufacturer’s recommendations and use an appropriate heat-resistant product when necessary.
If making these for homes with small children or pets, avoid loose embellishments such as beads, buttons, or detachable decorations.
Quick Printable Crochet Cat Coaster Pattern
Main Head
R1: 6 sc in MR — 6 sts
R2: inc × 6 — 12 sts
R3: (sc, inc) × 6 — 18 sts
R4: (2 sc, inc) × 6 — 24 sts
R5: (3 sc, inc) × 6 — 30 sts
R6: (4 sc, inc) × 6 — 36 sts
R7: (5 sc, inc) × 6 — 42 sts
R8: 42 sc
R9: 42 sc
R10: 42 sc
Fasten off.
Ears ×2
Ch 8
R1: 7 sc
R2: 6 sc
R3: dec, 4 sc — 5 sts
R4: dec, 3 sc — 4 sts
R5: dec, 2 sc — 3 sts
R6: dec, 1 sc — 2 sts
R7: dec — 1 st
Fasten off, leaving a long tail.
Sew both ears to the upper edge of the head.
Border
Attach yarn to the outer edge.
Work sc evenly around the complete cat silhouette.
Use additional stitches around sharp ear points if needed to prevent pulling.
Join with a slip stitch.
Fasten off and weave in all ends.
Optional Face
Embroider:
- 2 eyes
- 1 small nose
- 1 small mouth
- 2–3 whiskers on each side
Project Summary
| Category | Details |
|---|---|
| Skill level | Beginner |
| Time | Approximately 20–40 minutes |
| Finished size | About 10–12 cm |
| Yarn | Medium-weight cotton |
| Hook | 3.5–4 mm |
| Main stitch | Single crochet |
| Main piece | 1 |
| Ears | 2 |
| Border | Optional |
| Face | Optional |
| Blocking | Optional |
| Best use | Drink coasters and décor |
Frequently Asked Questions
Is this crochet cat coaster pattern beginner-friendly?
Yes. The main shape uses basic single crochet and increases. The ears require simple decreases, making this a useful project for practicing basic shaping.
What yarn should I use for a crochet coaster?
Cotton yarn is generally the best choice for a functional coaster because it is durable, relatively stable, and easy to care for.
How much yarn does one coaster require?
Approximately 15–25 g of medium-weight yarn is a reasonable estimate, although your actual usage will depend on the yarn and finished size.
How long does one cat coaster take?
A beginner may need around 30–40 minutes, while an experienced crocheter may finish one more quickly.
Can I use leftover yarn?
Yes. This is an excellent stash-busting project because each coaster requires only a relatively small amount of yarn.
Can I make the cat without the face?
Absolutely. A face is completely optional. The ears and rounded silhouette already make the design recognizable as a cat.
Why is my coaster curling?
The most common causes are tight tension or an uneven stitch count. Try a slightly larger hook and check that your stitch counts match the pattern.
How can I make my ears more pointed?
Keep your stitches consistent and make sure the decreases are worked correctly. Blocking the finished ears can also help sharpen their shape.
Can I make the coaster larger?
Yes. Continue the increase section for additional rounds before creating proportionally larger ears.
Can I make different cat breeds?
You can experiment with the colors and facial embroidery to create different cat-inspired looks. For example, stripes can suggest a tabby, while a black base with orange details makes a fun Halloween cat.
Can I sell finished cat coasters?
If you’re working from this original pattern, you can establish your own policy for finished handmade products. As a general pattern-use practice, don’t redistribute or republish the written instructions as your own.
Related Crochet Projects
If you enjoyed this crochet cat coaster, you may also like:
- Free Lying Duck Crochet Pattern — A cute beginner-friendly amigurumi project with detailed shaping and assembly instructions.
- Cute Crochet Panda Patterns — Adorable panda-inspired crochet projects for gifts and décor.
- Easy Crochet Baby Patterns — Small handmade projects that make thoughtful gifts.
- Crochet Dog Toy Patterns — Fun crochet projects for pet-loving crafters.
- Beginner Crochet Patterns — Simple projects for practicing basic crochet techniques.
- Easy Crochet Animal Patterns — More cute animal-inspired projects to add to your crochet list.
Affiliate Disclosure
Some of the links on this page may be affiliate links. If you purchase something through one of these links, we may earn a small commission at no additional cost to you. We only recommend crochet supplies that are relevant to the project and useful for our readers.
Final Thoughts
These crochet cat coasters are a wonderful example of how a small amount of yarn can become something both useful and decorative.
The basic pattern is simple enough for beginners, but there are plenty of ways to make the finished project your own. Try a dusty rose cat with a cream border, a mustard cat with white details, a minimalist black-and-white version, or a playful Halloween cat.
You can also make the entire set using leftover cotton yarn from previous projects, making this a particularly useful stash-busting pattern.
Start with one cat coaster to practice the shaping and ear placement. Once you’re comfortable with the pattern, make a matching set in your favorite colors.
A few simple changes in color, embroidery, or border design can make every cat look completely different.
Grab your hook, choose your favorite yarn, and make your first little crochet cat.