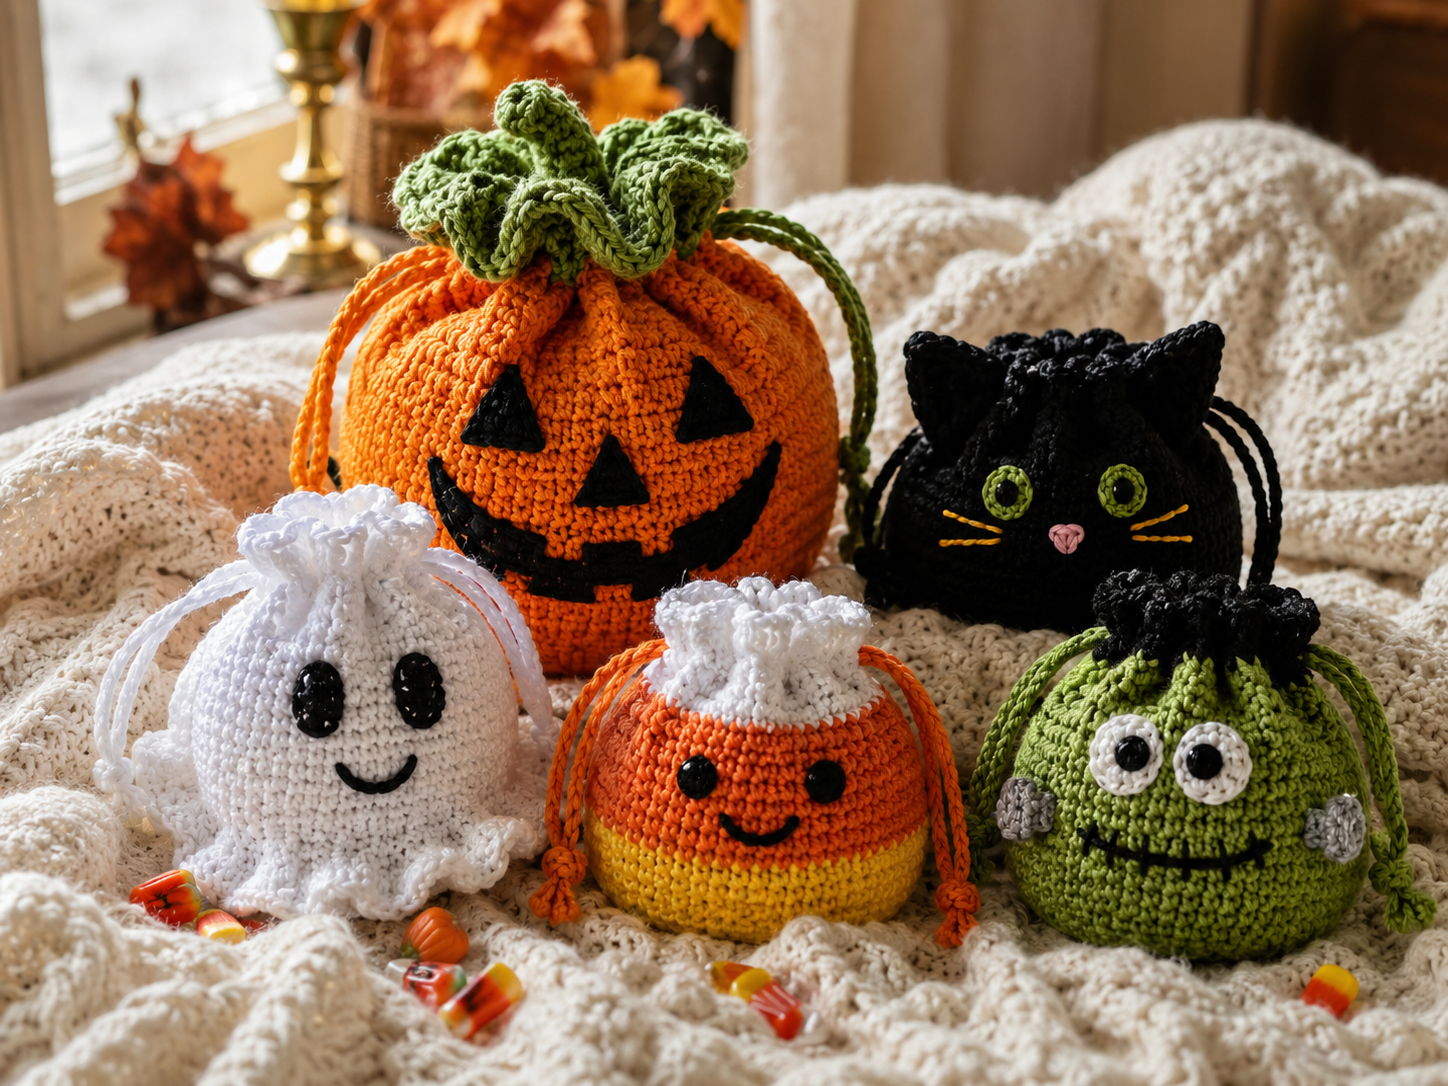
Halloween is the perfect time to combine crochet with a little creativity—and these crochet Halloween treat pouches are one of the easiest ways to do it.
Instead of handing out candy in an ordinary plastic bag, you can make a reusable handmade pouch shaped like a pumpkin, ghost, black cat, candy corn, monster and more.
These little crochet bags are useful for trick-or-treating, Halloween parties, classroom treats, party favors, small gifts and seasonal décor. Most designs can also be made in an afternoon, making them perfect for last-minute Halloween projects.
In this collection, you’ll find 18 Halloween crochet treat pouch designs, including a complete pumpkin pouch tutorial, beginner-friendly variations, color combinations, construction instructions, sizing tips, drawstring options and decorating ideas.
Whether you’re new to crochet or already love making amigurumi and seasonal projects, there’s something here to try.
Pattern note: The featured pumpkin pouch tutorial is an original crochet design created for this article. The other projects are design ideas and construction variations you can create using the techniques explained below.
Table of Contents
- Why Make a Crochet Halloween Treat Pouch?
- What Can You Use a Treat Pouch For?
- How Long Does a Crochet Treat Pouch Take?
- How Much Yarn Do You Need?
- Best Yarn for Halloween Pouches
- Choosing the Right Crochet Hook
- Materials You’ll Need
- Crochet Abbreviations
- Halloween Color Combinations
- 18 Crochet Halloween Treat Pouch Patterns & Ideas
- Featured Pattern: Pumpkin Treat Pouch
- Step-by-Step Pumpkin Pouch Tutorial
- How to Make the Drawstring
- How to Add a Jack-o’-Lantern Face
- Ghost Treat Pouch
- Black Cat Treat Pouch
- Candy Corn Treat Pouch
- Witch Hat Treat Pouch
- Frankenstein Treat Pouch
- Monster Treat Pouch
- Spider Treat Pouch
- Bat Treat Pouch
- Skull Treat Pouch
- Pumpkin Spice Treat Pouch
- Mummy Treat Pouch
- Vampire Treat Pouch
- Cauldron Treat Pouch
- Little Devil Treat Pouch
- BOO Treat Pouch
- Haunted House Treat Pouch
- Candy Monster Treat Pouch
- How to Change the Size
- How to Make a Stronger Pouch
- Beginner Tips
- Common Mistakes
- Halloween Party Ideas
- Frequently Asked Questions
- Related Crochet Patterns
- Final Thoughts
Why Make a Crochet Halloween Treat Pouch?
A small crochet pouch is a surprisingly versatile Halloween project.
Unlike a large crochet bag, it doesn’t require a huge amount of yarn or many complicated techniques. You can make one for yourself, create several for children or even use them as handmade party favors.
🎃 They’re beginner-friendly
Most of the designs use basic crochet techniques:
- Magic ring
- Single crochet
- Half double crochet
- Increases
- Decreases
- Chain stitches
- Simple embroidery
🧶 They use small amounts of yarn
This makes them perfect for using up leftover yarn from previous projects.
🍬 They’re practical
Fill them with candy, small toys, stickers or other Halloween treats.
🎁 They’re reusable
Unlike disposable treat bags, a handmade crochet pouch can be used year after year.
🕷️ They’re easy to personalize
Change the colors, facial expressions, size or decorations to create your own Halloween character.
What Can You Use a Treat Pouch For?
| Use | What to Put Inside |
|---|---|
| Trick-or-treating | Candy and small treats |
| Halloween parties | Party favors |
| Classroom gifts | Stickers and wrapped candy |
| Gift bags | Small handmade gifts |
| Halloween décor | Faux pumpkins or decorations |
| Candy holder | Wrapped sweets |
| Toy storage | Small toys |
| Photo props | Halloween accessories |
| Table décor | Candy or seasonal decorations |
How Long Does a Crochet Treat Pouch Take?
The time depends on the design and your crochet speed.
A simple pouch can take approximately:
| Experience | Approximate Time |
|---|---|
| Beginner | 2–3 hours |
| Intermediate | 1–2 hours |
| Experienced | About 1 hour |
More detailed designs with ears, appliqués or embroidered faces may take longer.
The pumpkin pouch featured below is intentionally simple enough to be a realistic weekend or afternoon project.
How Much Yarn Do You Need?
One of the best things about these projects is that you don’t need much yarn.
For a standard pumpkin pouch, you can expect to use approximately:
| Color | Approximate Amount |
|---|---|
| Orange | 40–60 g |
| Green | 5–10 g |
| Black | 5–10 g |
| Cream/white | 5–10 g |
These are estimates rather than strict requirements because yarn usage depends on tension, pouch size and yarn weight.
If you’re making several pouches, buying larger skeins of the main color will usually be more economical.
Best Yarn for Halloween Treat Pouches
Worsted-Weight Acrylic
This is my first recommendation for beginners.
It’s:
- Affordable
- Easy to find
- Durable
- Available in many colors
- Easy to work with
- Good for reusable bags
Cotton Yarn
Cotton creates a firmer fabric and is another excellent option.
It’s especially useful when you want the pouch to hold its shape.
Chenille or Plush Yarn
Plush yarn gives the pouch a soft, fuzzy appearance.
However, it can be more difficult to see your stitches.
If you’re making your first pouch, worsted-weight yarn is easier.
Choosing the Right Crochet Hook
For worsted-weight yarn, start with a:
4.0 mm crochet hook
If your stitches are loose and you can easily see large gaps between them, try a smaller hook.
For a treat pouch, you generally want a fairly dense fabric so small treats don’t easily slip through.
Materials You’ll Need
For the featured pumpkin pouch:
- Orange worsted-weight yarn
- Green yarn
- Black yarn
- 4.0 mm crochet hook
- Tapestry needle
- Scissors
- Stitch marker
- Small amount of polyester fiberfill
- Optional embroidery needle
- Optional crochet cord or ribbon
Crochet Abbreviations
| Abbreviation | Meaning |
|---|---|
| MR | Magic ring |
| ch | Chain |
| sc | Single crochet |
| hdc | Half double crochet |
| dc | Double crochet |
| sl st | Slip stitch |
| inc | Increase |
| dec | Decrease |
| st | Stitch |
| sts | Stitches |
| rnd | Round |
| rep | Repeat |
| FO | Fasten off |
US crochet terminology is used throughout this tutorial.
Halloween Color Combinations
Don’t feel limited to traditional orange and black.
| Theme | Main Color | Accent Colors |
|---|---|---|
| Classic Pumpkin | Orange | Green + black |
| Friendly Ghost | Cream | Black + pink |
| Black Cat | Black | Yellow + pink |
| Candy Corn | White | Orange + yellow |
| Witch | Purple | Green + black |
| Frankenstein | Green | Black + gray |
| Monster | Lime | Purple + black |
| Spider | Black | Red |
| Bat | Black | Purple |
| Autumn | Rust | Cream + brown |
| Cute Halloween | Pink | Lavender + orange |
| Midnight | Navy | Silver + white |
18 Crochet Halloween Treat Pouch Patterns & Ideas
Now for the fun part.
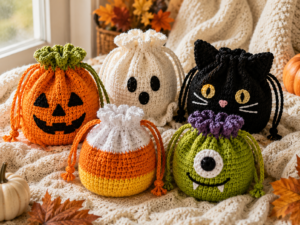
These 18 designs can all be built around the same basic pouch construction, then customized with colors, appliqués, embroidery or crocheted details.
1. Classic Pumpkin Treat Pouch 🎃
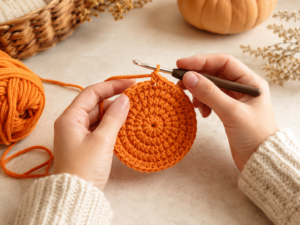
The pumpkin is probably the easiest Halloween design to recognize.
Colors
- Orange
- Green
- Black
Details
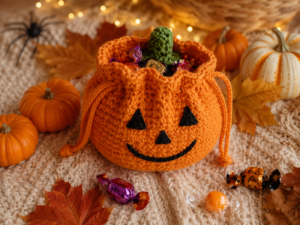
Create a round orange pouch, add a green stem and embroider a black jack-o’-lantern face.
Difficulty
Beginner
Best for
Trick-or-treating and Halloween parties.
2. Friendly Ghost Pouch 👻
For this design, use cream or white yarn.
Create the same basic pouch and embroider:
- Two black eyes
- Small smiling mouth
- Optional pink cheeks
For a more ghost-like shape, make the bottom slightly wider than the top.
Cute color palette
Cream + black + blush pink
3. Black Cat Treat Pouch 🐈⬛
Crochet the main pouch in black.
Then make two small triangular ears and attach them to the top.
Add:
- Yellow eyes
- Pink nose
- Black or white whiskers
A small purple or orange bow makes a cute finishing touch.
4. Candy Corn Treat Pouch 🍬
This design uses color changes to imitate candy corn.
Work from bottom to top:
Yellow → Orange → White
The pouch can remain completely plain without a face.
This makes it one of the easiest designs in the collection.
5. Witch Hat Treat Pouch 🧙♀️
Use black or dark purple yarn.
Create a round pouch for the bottom section, then add a pointed triangular top.
Finish it with a contrasting band.
Color combinations
- Black + orange
- Purple + green
- Black + purple
6. Frankenstein Treat Pouch
Use green as your main color.
Add:
- Black hair
- Dark embroidered eyebrows
- Simple eyes
- Small stitched mouth
- Optional gray “neck bolts”
For a beginner-friendly version, keep the face embroidered rather than crocheting separate pieces.
7. Monster Treat Pouch 👹
This is one of the easiest designs to personalize.
Choose any bright color:
- Green
- Purple
- Blue
- Orange
Then add one oversized eye or two mismatched eyes.
You can also embroider a large toothy smile.
8. Spider Treat Pouch 🕷️
Use black yarn for the pouch.
Add eight simple crocheted legs around the sides.
You don’t need complicated spider anatomy—the legs can simply be narrow chains or crocheted cords attached around the pouch.
Add two small red eyes for contrast.
9. Bat Treat Pouch 🦇
Crochet the pouch in black.
Make two pointed ears and two simple wing shapes.
Sew the wings onto the sides.
A purple drawstring gives the pouch an extra Halloween touch.
10. Skull Treat Pouch 💀
Use black as the main color.
Then add a white skull design using:
- White crochet appliqué
- Embroidery
- Felt pieces securely attached
For the easiest version, embroider two eye sockets and a simple mouth.
11. Pumpkin Spice Treat Pouch ☕
For a softer autumn aesthetic, use:
- Rust
- Cream
- Caramel
- Cinnamon brown
Skip the spooky face and decorate the pouch with a small crochet leaf or pumpkin.
This version can stay out all through fall.
12. Mummy Treat Pouch
Start with a cream or white pouch.
Add black eyes.
Then wrap narrow strips of cream yarn around sections of the pouch.
Keep the strips slightly uneven for a more handmade mummy effect.
13. Vampire Treat Pouch 🧛
Use:
- Black
- Burgundy
- White
Add a small embroidered mouth with two tiny white fangs.
A burgundy drawstring completes the design.
14. Witch’s Cauldron Pouch 🧪
Use dark green, black or charcoal yarn.
Create a rounded pouch and decorate the top with purple or green “bubbles.”
You can crochet small circles and sew them onto the front.
15. Little Devil Pouch 😈
Use red yarn.
Add two small triangular horns near the top.
Finish with:
- Black eyes
- Tiny smile
- Black or burgundy drawstring
This one works especially well as a small party favor.
16. BOO Treat Pouch
For an extremely simple beginner project, make a plain cream pouch.
Then embroider:
BOO
across the front in black yarn.
Add three tiny stars or dots around the lettering.
No complicated appliqués are necessary.
17. Haunted House Pouch 🏚️
Use dark navy, black or purple as the main color.
Decorate the front with:
- Small moon
- Tiny stars
- Haunted house silhouette
- Yellow windows
This is slightly more advanced because of the extra decorative details.
18. Candy Monster Pouch 🍭
Create a bright monster pouch and add an oversized mouth.
Use different colors for:
- Eyes
- Teeth
- Hair
- Bow
- Drawstring
This is a particularly fun project for children because there are almost no rules for the color combinations.
🎃 Featured Pattern: Crochet Pumpkin Treat Pouch
Now let’s make the classic pumpkin pouch.
This design uses a simple circular base followed by straight rounds, then a drawstring opening.
Finished Size
Approximately:
5–6 inches tall
with worsted-weight yarn and a 4.0 mm hook.
Your finished size will vary depending on yarn, hook and tension.
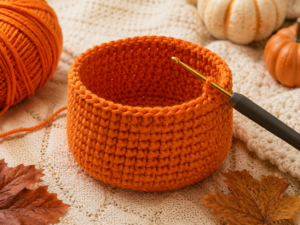
Step 1: Crochet the Base
With orange yarn:
Round 1
Make a magic ring.
Work:
6 sc into the ring
6 stitches
Round 2
inc around
12 stitches
Round 3
(sc, inc) around
18 stitches
Round 4
(2 sc, inc) around
24 stitches
Round 5
(3 sc, inc) around
30 stitches
Round 6
(4 sc, inc) around
36 stitches
At this point, your crochet piece should look like a small flat circle.
Step 2: Crochet the Sides
Now stop increasing.
Rounds 7–15
sc around
Keep working approximately 36 stitches per round.
The circle will begin to curl upward and form the sides of the pouch.
Want a taller pouch?
Simply add more straight rounds before creating the drawstring opening.
Step 3: Create the Drawstring Eyelets
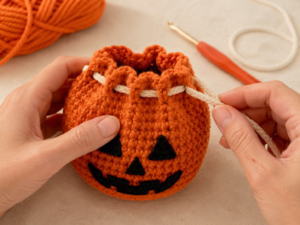
For the next round:
ch 2, skip 1 stitch, sc in the next stitch
Repeat around.
This creates evenly spaced openings around the top.
Finish with a slip stitch.
Step 4: Finish the Top
Work:
sc around
for one additional round.
Fasten off.
Weave in the yarn end securely.
Step 5: Make the Drawstring
You have several options.
Simple Chain Cord
Chain approximately:
70–80 stitches
Fasten off.
Stronger Crochet Cord
Chain the desired length, then work slip stitches back across the chain.
This produces a sturdier cord.
Ribbon
A narrow ribbon can also work if you’re making the pouch primarily as a decorative gift bag.
How to Thread the Drawstring
Starting at one eyelet, weave the cord through the openings:
over → under → over → under
until you reach the starting point.
Bring both ends together.
Pull gently.
The pouch should gather closed.
Step 6: Make the Pumpkin Stem
Switch to green yarn.
Round 1
Magic ring:
6 sc
Rounds 2–4
sc around
Fasten off.
Leave a long sewing tail.
Sew the stem securely to the top of the pumpkin.
Step 7: Add the Jack-o’-Lantern Face
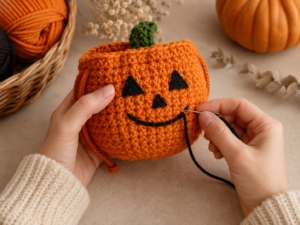
Use black yarn.
You can create a classic face using:
Eyes
Two triangles.
Nose
One small triangle.
Mouth
A curved smile.
For a spooky version, add small triangular teeth.
For a cute version, keep the mouth simple and rounded.
How to Add Pumpkin Ridges
For a more realistic pumpkin appearance, use darker orange, brown or green yarn.
Thread your yarn needle and make long curved stitches from the top toward the bottom.
Repeat several times around the pouch.
Don’t pull too tightly.
You want the stitches to gently define the pumpkin sections rather than pinch the fabric.
How to Make the Pouch Larger
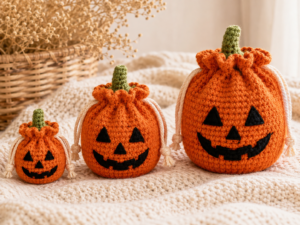
The easiest way to change the width is to add another increase round.
For example, after reaching 36 stitches, continue increasing:
(5 sc, inc) around
This gives you approximately:
42 stitches
Then continue working straight rounds.
How to Make a Mini Treat Pouch
For small party favors:
- Stop increasing earlier
- Work fewer body rounds
- Use thinner yarn
- Use a smaller hook
A mini pouch is perfect for:
- One or two candies
- Stickers
- Small toys
- Party favors
How to Make a Large Trick-or-Treat Bag
For a larger bag:
- Add more increase rounds to the base.
- Continue straight rounds for additional height.
- Use a stronger drawstring.
- Consider cotton or sturdy acrylic yarn.
- Reinforce the drawstring area.
For very large bags, adding a fabric lining can also increase durability.
How to Make Your Pouch Stronger
If you want your treat pouch to survive multiple Halloweens, pay attention to construction.
Use dense stitches
A slightly smaller hook can create a stronger fabric.
Reinforce the drawstring
The top edge receives a lot of stress when the bag is repeatedly opened and closed.
Secure your yarn ends
Weave them through several stitches.
Consider a lining
A lightweight fabric lining can make the pouch more durable and prevent small treats from slipping through.
Beginner Tips
1. Count your stitches
A missing or extra stitch can change the shape of the pouch.
2. Use a stitch marker
Place it in the first stitch of every round.
3. Keep your tension consistent
This helps the pouch maintain an even shape.
4. Don’t make the eyelets too large
The drawstring should slide easily but shouldn’t fall out.
5. Test the closure
Before filling the pouch, pull the drawstring several times.
6. Sew decorations securely
Especially if the pouch will be handled frequently.
Common Mistakes and How to Fix Them
The base is wavy
You may have increased too many times.
Fix: Check your stitch count after every increase round.
The pouch is too loose
Your hook may be too large.
Fix: Try going down 0.5–1 mm.
The pouch doesn’t stand upright
This is usually caused by loose stitches or very soft yarn.
Fix: Try cotton yarn or a smaller hook.
The drawstring doesn’t slide
The eyelets may be too small.
Fix: Increase the chain space slightly.
The face looks uneven
Don’t worry about tiny imperfections.
If you want a symmetrical face, mark the center of the pouch first and position both eyes before sewing.
Halloween Party Ideas
These pouches can become part of the party itself.
DIY Favor Station
Place several unfinished pouches on a craft table and let guests choose their colors.
Candy Bar
Make several mini pouches and place them beside a bowl of wrapped candy.
Trick-or-Treat Basket
Create a collection of different characters and let children choose their favorite.
Halloween Table Décor
Fill small pouches with wrapped candy and place them around your dinner table.
Safety Tips
If these pouches are intended for very young children, avoid loose small decorations.
Instead of buttons or detachable plastic pieces, consider:
- Embroidered eyes
- Embroidered mouths
- Securely sewn crochet details
For trick-or-treating, use age-appropriate materials and make sure the drawstring is securely attached.
Quick Pattern Reference
| Round | Instructions | Approx. Stitch Count |
|---|---|---|
| 1 | 6 sc in MR | 6 |
| 2 | inc around | 12 |
| 3 | (sc, inc) around | 18 |
| 4 | (2 sc, inc) around | 24 |
| 5 | (3 sc, inc) around | 30 |
| 6 | (4 sc, inc) around | 36 |
| 7–15 | sc around | 36 |
| 16 | ch 2, skip 1, sc | Eyelet round |
| 17 | sc around | 36 |
Note: The stitch count in the eyelet round can vary slightly depending on how you work the chain spaces.
Project At a Glance
| Detail | Recommendation |
|---|---|
| Project | Halloween treat pouch |
| Skill level | Beginner |
| Yarn | Worsted-weight acrylic |
| Hook | 4.0 mm |
| Main color | Orange |
| Accent colors | Green + black |
| Construction | Worked in rounds |
| Closure | Drawstring |
| Approx. size | 5–6 inches |
| Estimated time | 1–3 hours |
| Best use | Candy + party favors |
| Customizable | Yes |
Frequently Asked Questions
Is this crochet Halloween treat pouch beginner-friendly?
Yes. The featured pumpkin pouch uses basic single crochet, increases, chain spaces and simple embroidery. It is a good project for a beginner who has already learned the basic crochet stitches.
How much yarn does one pouch need?
A standard pouch generally uses around 40–60 grams of the main color, although the exact amount depends on yarn weight, tension and size.
What is the best yarn for a crochet treat pouch?
Worsted-weight acrylic is an excellent beginner-friendly option. Cotton is another good choice if you want a firmer pouch.
Can I use plush yarn?
Yes, but plush yarn can make individual stitches harder to see. If you’re new to crochet, regular worsted-weight yarn may be easier.
Can I make the pouch bigger?
Yes. Add additional increase rounds to make the base wider, then continue working straight rounds to increase the height.
Can I make a mini version?
Absolutely. Reduce the number of increase rounds and make fewer straight rounds.
How do I make the pouch stand up?
Use firm yarn, tighter stitches and a smaller hook. A cotton yarn can also give the pouch more structure.
Can I sell finished pouches?
You can make and sell your own finished handmade items, subject to applicable laws and marketplace rules. Avoid using protected character names, logos or branding in a way that suggests an official product.
Related Crochet Patterns
If you enjoyed these Halloween crochet projects, check out these related ideas:
15 Beautiful Fall Crochet Table Runner Patterns for a Cozy Autumn Table
Perfect for adding more spooky projects to your Halloween crochet list.
Crochet Pumpkin Mug Cozy Pattern | Cozy Fall Coffee Cup Sleeve
A collection of simple seasonal projects for newer crocheters.
31 Halloween Kitchen Decor Ideas That Make Your Kitchen Spooktacular
More pumpkin-inspired projects for fall and Halloween.
21 Crochet Halloween Bag Ideas, Patterns & Tutorials
Great for decorating your home with handmade Halloween pieces.
21 Crochet Strawberry Kitchen Ideas, Patterns & Decor
More cute and cuddly projects to try after your treat pouch.
27 Crochet Coaster Ideas, Patterns & Tutorials for a Beautiful Kitchen
Beautiful handmade projects for transitioning your home into autumn.
27 Halloween Kitchen Decorating Ideas for a Spooky Party
Handmade gift ideas for friends, family and Halloween parties.
Final Thoughts
Crochet Halloween treat pouches are small, practical and incredibly easy to personalize.
The classic pumpkin is a great place to start, but once you’ve learned the basic pouch construction, you can turn the same idea into a ghost, black cat, candy corn, witch, Frankenstein, monster, spider, bat or almost anything else you can imagine.
You can make tiny versions for party favors, medium pouches for candy or larger versions for trick-or-treating.
And because these projects don’t require huge amounts of yarn, they’re also a great way to use up leftover colors from your stash.
So grab your orange yarn, choose your favorite Halloween character and start crocheting something spooky and cute. 🎃🧶
Happy crocheting, and have a wonderfully crafty Halloween!